Abstract
Personal web servers are a great way to save manuals, interesting links, trip memories, and many other bits and pieces of information.
We are going to create a home Wiki using a Raspberry Pi and a USB hard disk. This will be a headless server, meaning that it can live anywhere it can connect to your network.
Why a wiki on a local web server?
I image some of you are wondering why you would want a local web server when all the information is on the World Wide Web. Additionally you are probably wondering why a Wiki when you can put web pages on your laptop, or just bookmark the interesting web sites.
Why a Local web server
If you live by yourself or are the only computer user in a house it is simpler to put everything on your local computer. But here are other reasons to have a dedicated web server.
One reason is that when you upgrade your laptop, the contents of the web server and links are preserved. Another reason is that backup is easier since the web server is usually a smaller backup size.
Another reason is that you can organize your information into a format that is customized to your liking. If, like me, you have many bookmarks from different interests, it is easier to organize them, and reorganize them to suit your changing interests.
Finally, if you have more than one user, or more than one browser, you can always find things in an organization of your design.
Why a Wiki
A wiki has several things going for it that a typical website does not have.
If more than one user has edit abilities, the wiki keeps track of who made what changes when. It also allows you to keep a history of what changes were made when.
Additionally, it is easier to learn the editing commands of a wiki than those of most web editors. The tags are somewhat simpler for simple changes, but you can add more complex tags, if you master the syntax needed. And the editing is done inside a web browser so no other tools or programs are needed. To work without a wiki you would need to edit the web page with a local tool then upload it to the web site.
The structure of a wiki allows searches and organization which are much more complicated on a normal website.
Lastly, having a wiki does not prevent you from also having web pages which fall outside of the wiki.
What do you need
Here is a list of what hardware you will need
Raspberry Pi 3B or 4 board Raspberry Pi 3 Model B
Micro SD card, 8 gig or larger SanDisk Pre-Installed NOOBS MicroSD Cards
A USB battery charger and cable. The charger should be 10 watts or larger Raspberry Pi 3 Power Supply
Optional Case for Raspberry Pi 3B Raspberry Pi 3 Case
- Raspberry Pi 4 kit containing all the above Raspberry Pi 4B Starter Kit
USB Hard Disk Portable 1TB External Hard Drive HDD
Items needed for setup
HDMI capable monitor, and cablr.
USB keyboard
USB mouse
Ethernet cable is optional, but recommended.
Personal Computer, Laptop or desktop on the same network.
Skills Needed
You will need the ability to type commands into a terminal to follow this setup. You will need an SSH program such as Putty Gen to remotely access the web server.
We will be working at the command line in a Linux system on the raspberry pi. Your laptop or desk computer can run Windows, Mac or Linux as long as it has a working web browser.
Install Raspberry Pi OS
If you purchased a SD card with the Raspberry Pi image already installed, you can skip this section.
Download and install the Raspberry Pi Imager from Raspberry Pi OS. Mount a micro SD card on your computer, and run the app rpi-imager. Select the Raspberry PI OS (32bit) for your Operating System. For Storage select the micro-SD you mounted. After making your selections, start the installation and wait for it to finish.
Initialize the Raspberry Pi without a Monitor
For those of you who are brave enough, you can do the setup with only your computer using SSH. The instructions are at How to Set Up a Headless Raspberry Pi, Without Ever Attaching a Monitor.
Initialize the Raspberry Pi with Monitor
Install the micro-SD card into the holder on the bottom of the rpi. Plug a keyboard, mouse, ethernet cable and HDMI monitor into the rpi. Finally connect a power cable from a 5 volt charger to the rpi.
Wait for the rpi to finish the initialization and start running. You will know it is done when it brings up the window Welcome to Raspberry Pi. Click on the next button.
Select the following:
- Country: United States
- Language: American English
- Time Zone: Eastern
- Use English Language
- Use US Keyboard
Click Next to continue.
Change the password to something you can remember. Then click Next.
Check the size of the task bar. This is not important for our use since we will be using this as a headless server.
Click next.
Select WiFi Network, Click next. This step is not needed if you have an ethernet cable.
Otherwise, enter the WiFi Password and click next. This step is not needed if you have an ethernet cable.
Update software is next just click next. When it is done click OK to continue. This is to update the software to the newest version.
Click later to set up the network.
Network configuration
I will be using the instructions from Configuring the Raspberry Pi Ethernet Port With a Static IP Address
On the menu bar at the top of the screen click the black square to bring up a terminal. Type the command ifconfig to view the network ports. One of the lines should start with eth0: or something other than wifi or ;o. This is the Ethernet port.
Type in the command sudo cp /etc/dhcpcd.conf /etc/dhcdcp.backup to backup the dhcpcd.conf file.
Now we are going to edit the dhcpcd.conf file using the nano editor. Type in the command sudo nano /etc/dhcpcd.conf *The values shown are from my system, yours may vary.
Place these lines at the top of the file too set the Ethernet port (eth0 or what other name you got above) to a static IP address. Or find the section of the file marked: # Example static IP configuration: and change the values there.
interface eth0

static ip_address=192.168.1.142/24

static routers=192.168.1.50

static domain_name_servers=192.168.1.50

Set the address (ip_address) to the IP address you want the
Raspberry Pi to occupy.

Set the routers value to the gateway address

If available, set to domain_name_servers to you name servers

Once the file has been updated, use ctrl x to save and exit.
Once you have saved the configuration you should reboot the rpi by typing sudo reboot. After you reboot, open a terminal window and type the command ifconfig. Look at the first line and see if it says eth0: or some other address, mine says enxb827ebc1432c:. If so edit /etc/dhcpcd.conf and replace eth0: with the new name
Finding Network info on Windows
To find an unused IP address you can pick an address like 192.168.1.20 and try to ping the address to see if it responds. If it does not respond it should be good to use for your static address on the rpi. Use the command netstat -rn in an admin terminal, to see what base values you have on your system. My base values are 192.168.1 So I tried 192.168.1.142.
To find the routes and domain_name_servers, open an Admin terminal window and run the command netstat -rn. You should get something like this:
Kernel IP routing table
Destination     Gateway         Genmask         Flags   MSS Window  irtt Iface
0.0.0.0         192.168.1.50    0.0.0.0         UG        0 0          0 wlp4s0
0.0.0.0         192.168.1.50    0.0.0.0         UG        0 0          0 wlp4s0
169.254.0.0     0.0.0.0         255.255.0.0     U         0 0          0 wlp4s0
192.168.1.0     0.0.0.0         255.255.255.0   U         0 0          0 wlp4s0
192.168.1.0     0.0.0.0         255.255.255.0   U         0 0          0 wlp4s0
208.67.222.222  192.168.1.50    255.255.255.255 UGH       0 0          0 wlp4s0
On the line Destination 0.0.0.0 the entry under gateway is the route number, or 192.168.1.50 above. At the bottom is the line with gateway of 192.168.1.50 and an IP address that is not 0.0.0.0 or 206.67.666.666 above. This is you domain_name_servers IP address.
Disable WiFi and Bluetooth
I am using the information from How to disable Wi-Fi on Raspberry Pi?
Edit the file with sudo nano /boot/config.txt. Find the line: # Additional overlays and parameters are documented /boot/overlays/README and add these two lines.
dtoverlay=disable-wifi
dtoverlay=disable-bt
Save the file and reboot.
Setting a Hostname
We will give this server a host name to make it easier to find on the network. Run the command sudo raspi-config to start the configuration app. From the first menu select System options, and press enter to select. Next using the arrow keys select Hostname and press enter. Press OK to bypass the specs for host names. Type in your new host name, and press enter to finish. Press the tab key to move the highlight to Finish, and press enter. It is probably best to reboot now.
Enabling SSH
I will follow the steps from How to Enable SSH on Raspberry Pi. After the rpi restarts go to the raspberry at the top left corner and select Preferences - Raspberry Pi Configuration. Now go to the Interface tab and enable SSH. You might also go to the System tab and set Boot: to CLI to save power when using headless. Click OK when done.
Now that ssh is enabled, lets try using the application Putty to access the server. You can download putty from Putty Gen. I find this an easy to use SSH client to access the headless client.
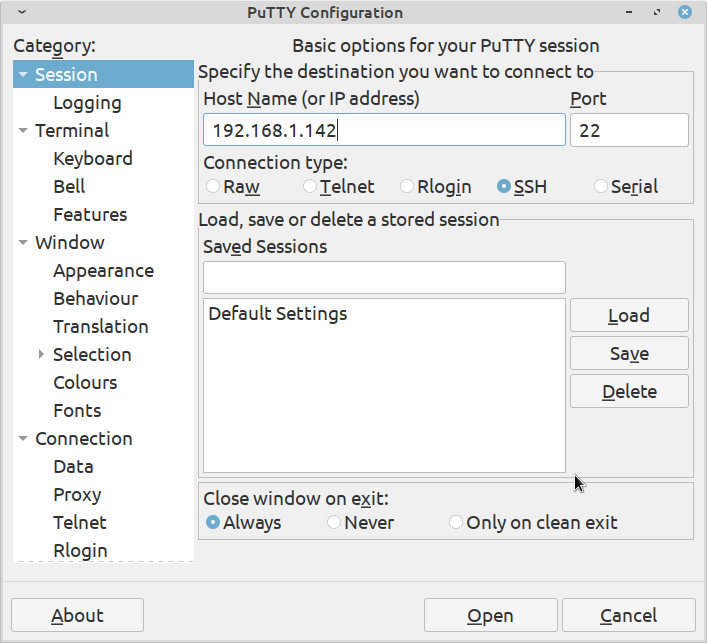
Now lets see if you can access the rpi from your laptop. Using the program Putty. Enter the IP address you selected and run the app. Login with the user pi and the password you set before. If everything goes well you should now be able to run commands on the rpi from you laptop.
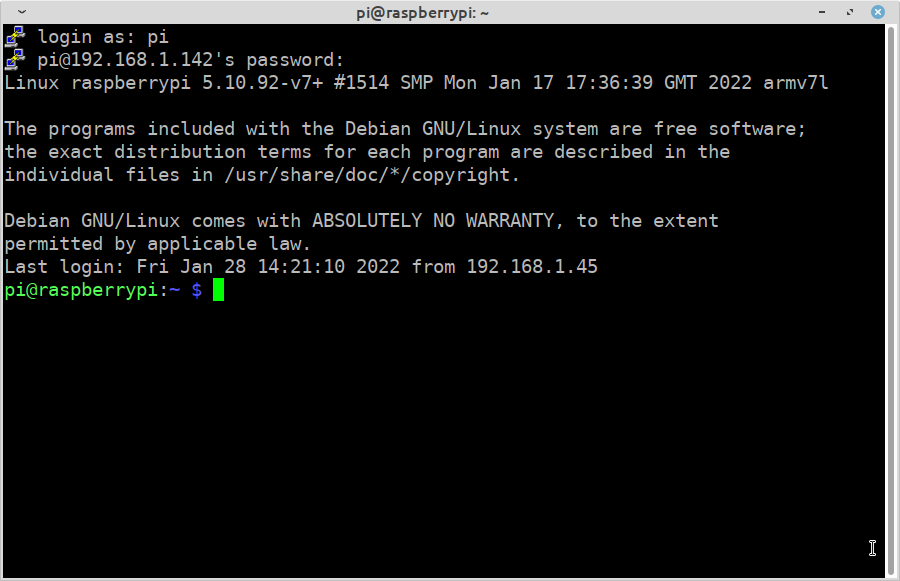
Congratulations you have accomplished the first step.
Installing Media Wiki
For this section I am using the instructions at: Manual:Running MediaWiki on Debian or Ubuntu.
Since many of the steps are done by an admin user, I typically promote my user to admin with the command sudo -i.
Lets start by making sure all the software is up to date: apt-get update && apt-get upgrade. The system will ask you to approve the update, just answer Y to proceed.
If you get a comment like:
The following package was automatically installed and is no longer required:
 libfuse2
Use 'apt autoremove' to remove it.
At the end of the update we will use the command: apt autoremove to handle this option. Use the command apt autoremove.
Install LAMP stack
The LAMP (Apache, PHP, and MySQL) stack contains the Web server Apache, the web server command language PHP, and the database MySQL. The MySQL database has been replaced with the mariadb database.
You want to copy these commands and paste them into the putty window. You highlight the commands lines in the web browser and use control-C to copy them. Then place your cursor in the Putty window and use “Shift-insert” to paste them.
Lets use the command: apt-get install apache2 mariadb-server php php-mysql libapache2-mod-php php-xml php-mbstring
Now we will add some additional tools to make Wiki more flexable: apt-get install php-apcu php-intl imagemagick inkscape php-gd php-cli php-curl php-bcmath git
Install Media Wiki
Type or copy the following commands one line at a time:
cd /tmp/
wget https://releases.wikimedia.org/mediawiki/1.37/mediawiki-1.37.1.tar.gz

tar -xvzf /tmp/mediawiki-*.tar.gz
sudo mkdir /var/lib/mediawiki
sudo mv mediawiki-*/* /var/lib/mediawiki
Configuring MySQL
Note: even though the current database is actually maria is can still be called MySQL
First we need to start the database in the background: mysqld_safe –skip-grant-tables –skip-networking &. This might respond with “mysqld_safe A mysqld process already exists” if so the database is already started.
Second create a password for the root user of the database.
# mysql -u root -p
Enter password: Enter password of mysql root user (if you have not configured password it will be blank, so just press enter)
mysql> CREATE USER 'new_mysql_user'@'localhost' IDENTIFIED BY 'THISpasswordSHOULDbeCHANGED';
mysql> quit;
Third we create a database to use for the wiki
# mysql -u root -p
mysql> CREATE DATABASE my_wiki;
mysql> use my_wiki;
Database changed
Fourth we need to grant permissions on the database
mysql> GRANT ALL ON my_wiki.* TO 'new_mysql_user'@'localhost';
Query OK, 0 rows affected (0.01 sec)
mysql> quit;
Now lets try to see if the mediawiki responds. In your web browser enter the URL http://192.168.1.142/mediawiki/ where 192.168.142 is the IP address of your rpi. If your IP is different, then change the value in the command.
If this gives a 404 error then working a symbolic link should solve it:
ln -s /var/lib/mediawiki /var/www/html/mediawikiNow try again.
Mediawiki configuration
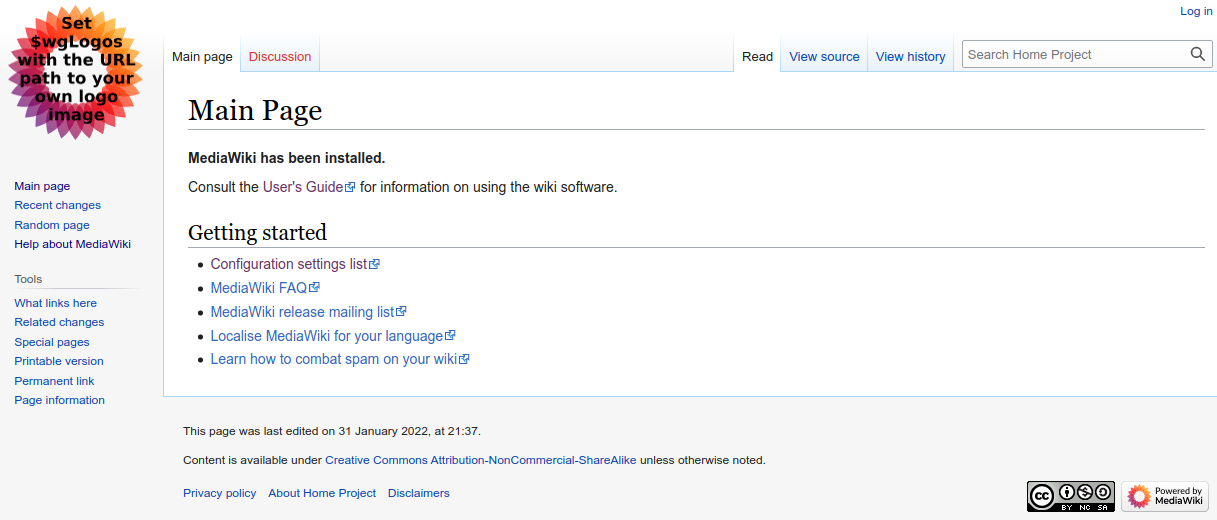
Lets try starting the mediawiki in the web browser. http://192.168.1.142/mediawiki/. Mine looked like:
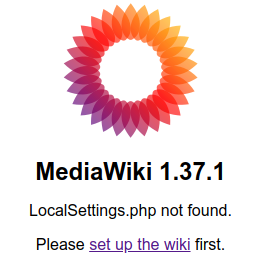
Lets go through the configuration as presented at the web site: http://192.168.1.142/mediawiki/mw-config/index.php or by clicking on the link set up the wiki.
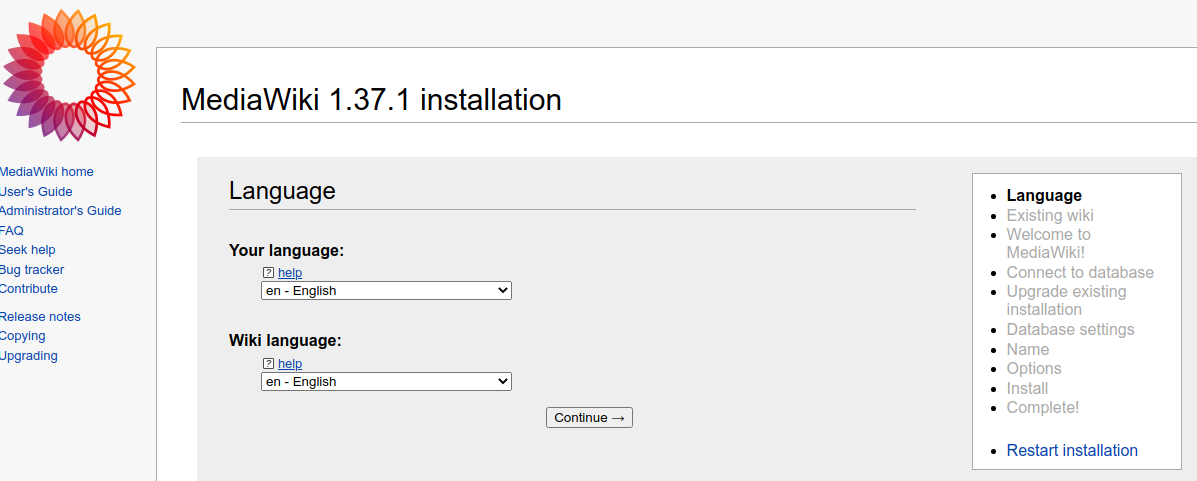
Language
The language is probably set correctly, so click on continue. Look over the Environmental checks to see that they are OK. Ignore the 32 bit warning. The Raspberry Pi is only a 32 bit processor so we are stuck with this option. Click continue to progress.
For the database you should be able to accept all the values except the database username and password. You will need to fill in the one you set above. The values I have are:
Database Type
Database type: MariaDB, MySQL, or compatible
Database host: localhost
Database name (no hyphens): my_wiki
Database table prefix (no hyphens):
Database username: new_mysql_user
Database password: ••••••••••••••••
Now click continue.
Database Settings
When asked Database account for web access be sure Use the same account as for installation is selected and click continue.
Name
Next you need to fill in some data about the wiki and it’s user. Here is the data from my system.
Name of wiki: Home Project
Project namespace: Same as the wiki name: Home_Project
Administrator account Your username: john
Password: ••••••••**
Password again: ••••••••**
Email address: john.moore@lions-wing.net
Subscribe to the release announcements mailing list: no
Share data about this installation with MediaWiki developers: no
I then selected Ask me more questions. to provide more information to the wiki. Click continue to proceed.
Options
I used the following options. You may pick your own.
User rights profile: Authorized editors only
Copyright and license: Creative Commons Attribution-NonCommercial-ShareAlike
Email settings: Enable outbound email: no
Skins (select all three, but use only one)
- MonoBook (screenshot) Use this skin as default: no
- Timeless (screenshots: 1, 2, 3, 4) Use this skin as default: no
- Vector (screenshot) Use this skin as default: yes
Extensions
- Special pages:
- CiteThisPage: no
- Interwiki: no
- Nuke: no
- Renameuser: no
- ReplaceText: no
- Editors
- CodeEditor (requires WikiEditor): enable
- VisualEditor: enable
- WikiEditor: enable
- Parser hooks
- CategoryTree: no
- Cite: no
- ImageMap: yes
- InputBox: no
- ParserFunctions: no
- Poem: no
- Scribunto: no
- SyntaxHighlight_GeSHi: no
- TemplateData: no
- Media handlers
- PdfHandler: yes
- Spam prevention
- ConfirmEdit: no
- SpamBlacklist: no
- TitleBlacklist: no
- API
- PageImages: no
- Other
- Gadgets: no
- LocalisationUpdate: no
- MultimediaViewer: no
- OATHAuth: no
- SecureLinkFixer: no
- TextExtracts: no
- Special pages:
Images and file uploads
- Enable file uploads: yes
- Directory for deleted files: /var/lib/mediawiki/images/deleted
Logo URL: $wgResourceBasePath/resources/assets/wiki.png
Enable Instant Commons: yes
Advanced configuration
Settings for object caching:
- No caching (no functionality is removed, but speed may be impacted on larger wiki sites): no
- PHP object caching (APC, APCu or WinCache): yes
- Use Memcached (requires additional setup and configuration): no
Click continue. When asked to do the install click continue. You should now see a page something like this:
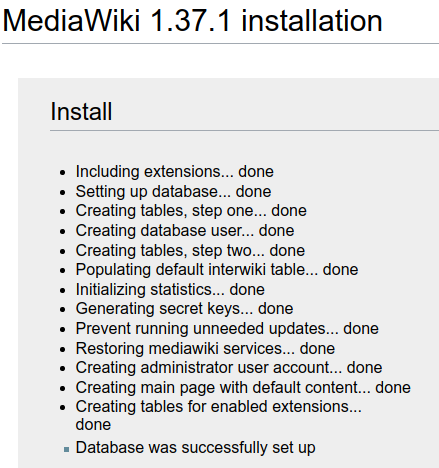
Click continue to finish up. Save the file into the Downloads directory on your computer.
Uploading LocalSettings.php
Uploading the file LocalSettings.php using putty is slightly complicated by will work. Open putty from your local computer to the wiki computer. Now use the command sudo -i to become a root user. Change directory with cd /var/lib/mediawiki/, next open the editor with the command nano LocalSettings.php.
Open the local file LocalSettings.php in an editor like Notepad. Highlight the whole file with Control-A. Copy the contents to the clip board. Now in putty paste the contents of the clipboard into the file with Shift-Insert.
Save the file with Control-O and exit the editor with Control-X.
We can now start the wiki by going to http://192.168.1.142/mediawiki. Congratulations you have your own wiki.
Making more space
One common issue with a Raspberry Pi is the fact that it uses a SD card for it’s storage. The issue is that SD cards have a limited number of read/write cycles before they start to fail. When you are just experimenting long term failure of the SD card is not an issue. But if we want something that lasts longer we need a more reliable storage method. That is why we added a USB hard disk to the system. Now we are going to make use of the hard disk to store the data.
Partitioning the hard disk
First we need to find the hard disk. In your putty window to the rpi lets run the command fdisk -l to list the current disks. When I run this command on my system it returns:
Disk /dev/ram15: 4 MiB, 4194304 bytes, 8192 sectors
Units: sectors of 1 * 512 = 512 bytes
Sector size (logical/physical): 512 bytes / 4096 bytes
I/O size (minimum/optimal): 4096 bytes / 4096 bytes


Disk /dev/mmcblk0: 14.84 GiB, 15931539456 bytes, 31116288 sectors
Units: sectors of 1 * 512 = 512 bytes
Sector size (logical/physical): 512 bytes / 512 bytes
I/O size (minimum/optimal): 512 bytes / 512 bytes
Disklabel type: dos
Disk identifier: 0x8c18746c

Device         Boot  Start      End  Sectors  Size Id Type
/dev/mmcblk0p1        8192   532479   524288  256M  c W95 FAT32 (LBA)
/dev/mmcblk0p2      532480 31116287 30583808 14.6G 83 Linux


Disk /dev/sda: 232.89 GiB, 250059350016 bytes, 488397168 sectors
Disk model: 2500BMV External
Units: sectors of 1 * 512 = 512 bytes
Sector size (logical/physical): 512 bytes / 512 bytes
I/O size (minimum/optimal): 512 bytes / 512 bytes
Disklabel type: dos
Disk identifier: 0x5c74ae42
Before the Disk /dev/ram15 was 14 other ram disks. We are going to ignore them. The entry Disk /dev/mmcblk0: is the SD card with the boot partition and system partition on it. The entry Disk /dev/sda: is my USB hard disk. We are going to partition this disk.
Type the command fdisk /dev/sda into the terminal. It should return something like:
Welcome to fdisk (util-linux 2.36.1).
Changes will remain in memory only, until you decide to write them.
Be careful before using the write command.


Command (m for help):
Any time you want to see the commands you can type m for help. Lets create 3 partitions of 50 gig each. So the commands for the first partition are: I will give the command followed by a # to begin a comment about what is happening. Each command is followed by enter.
n # Create a new partition
p # make a primary partition
1 # The first partition
enter # Accept the default
+50G # make it 50 gig in size
Now lets look at what was done, enter the command p My system shows:
Device     Boot Start       End   Sectors Size Id Type
/dev/sda1        2048 104859647 104857600  50G 83 Linux
OK, now you should create two more similar partitions. When you are done it will look like this:
Device     Boot     Start       End   Sectors Size Id Type
/dev/sda1            2048 104859647 104857600  50G 83 Linux
/dev/sda2       104859648 209717247 104857600  50G 83 Linux
/dev/sda3       209717248 314574847 104857600  50G 83 Linux
Finally we use the command w to write the new partition table.
Formatting the new partitions
Now that the partitions are created, we need to format them. The command is mkfs.ext4 /dev/sda1 to format the first partition as an ext4 type. On my system it returns:
root@raspberrypi:~# mkfs.ext4 /dev/sda1
mke2fs 1.46.2 (28-Feb-2021)
Creating filesystem with 13107200 4k blocks and 3276800 inodes
Filesystem UUID: 6cb86439-22a9-45b7-b52f-a3293a2d97f6
Superblock backups stored on blocks:
    32768, 98304, 163840, 229376, 294912, 819200, 884736, 1605632, 2654208,
    4096000, 7962624, 11239424

Allocating group tables: done
Writing inode tables: done
Creating journal (65536 blocks): done
Writing superblocks and filesystem accounting information: done
Repeat the same process for partitions /dev/sda2 and /dev/sda3.
Mounting the new partitions
To make use of the new partitions we need to mount them. First we will create folders under /mnt to mount them. mkdir /mnt/sda1 /mnt/sda2 /mnt/sda3
Now lets mount each partition to one of the folders. The command for the first partition would be: mount -v -t ext4 /dev/sda1 /mnt/sda1 which should return:
mount: /dev/sda1 mounted on /mnt/sda1.The command is mount, the -v option is to be verbose, the -t ext4 tells the system what type the partition is, the /dev/sda1 is the partition to use, and /mnt/sda1 is where to mount it.
Repeat the command for the other two partitions.
Now before we proceed we are going to stop two background processes. Lets use the system service control program to stop them systemctl stop apache2.service and systemctl stop mariadb.service.
Copying the data
We are going to transfer data to the new partitions. We are going to use sda1 for /var/www, sda2 for /var/lib/mediawiki, and sda3 for /var/lib/mysql.
Change to the base directory cd /var/www then copy the data with find . -print | cpio -pv /mnt/sda1. Lastly remove the old data with rm -fr *. Next we are going to change the partition to the new location. umount -v /mnt/sda1 then mount -v -t /dev/sda1 /var/www.
What we have done is expand the space under /var/www to 50 gig. The command find does a recursive walk from the current directory and outputs the name of the file/folder. The command cpio copies the file from it current location to it new location. The options are -v for verbose and -p to pass the files from standard in to the new location. We then use the rm remove command with the options -f to force and -r to recurse. After removing the old files we unmount the partition and remount it to the directory we are in.
We are going to the same operations on /var/lib/mediawiki to /mnt/sda2 and /var/lib/mysql to /mnt/sda3. Once we have done these operations we can use the command df -H to see the results. Mine looks like:
root@raspberrypi:/var/lib/mysql# df -H
Filesystem      Size  Used Avail Use% Mounted on
/dev/root        16G  4.5G   11G  31% /
devtmpfs        350M     0  350M   0% /dev
tmpfs           484M     0  484M   0% /dev/shm
tmpfs           194M  734k  193M   1% /run
tmpfs           5.3M  4.1k  5.3M   1% /run/lock
/dev/mmcblk0p1  265M   51M  214M  20% /boot
tmpfs            97M   17k   97M   1% /run/user/1000
/dev/sda1        53G   41k   50G   1% /var/www
/dev/sda2        53G  283M   50G   1% /var/lib/mediawiki
/dev/sda3        53G  202M   50G   1% /var/lib/mysql
Making the change permanent
Next we need to make the change stick through the next reboot. To do this we are going to make a few changes.
First we are going to disable starting the database automatically. The reason is that the USB drives do not initialize at the same time as the SD card. So we need to wait for the drive to settle before mounting it. Secondly, we need the drives mount before we can start the database. So here is my solution:
First lets create a file with the following commands using the nano editor. Type nano /etc/mount.manual.sh, and enter the following information.
#!/usr/bin/bash
# Manual mount for USB disk
sleep 60
mount -v -t ext4 /dev/sda1 /var/www
mount -v -t ext4 /dev/sda2 /var/lib/mediawiki
mount -v -t ext4 /dev/sda3 /var/lib/mysql
sleep 10
systemctl start mariadb.service
echo "Started the MySQL database"
This file sleeps for 60 seconds after the system boots, then it mounts the USB disk partitions. It then sleeps another 10 seconds before starting the database. It also prints messages on the terminal to indicate what is happening, if you were watching the terminal.
Next we need to make this file executable with the command chmod +x /etc/mount.manual.sh. To run the file at boot we add a line to /etc/rc.local file. Open the file with the command nano /etc/rc.local.
Before the line exit 0 add the two lines.
# Mount the drive and start mariadb
/etc/mount.manual.sh &
Save the file and exit nano. Lastly lets disable the database from starting automatically with systemctl disable mariadb.service.
Now it is time to reboot to check the changes. After the system has fully started lets try it in a web browser at http://192.168.1.142/mediawiki Mine looks like:
Using My Wiki
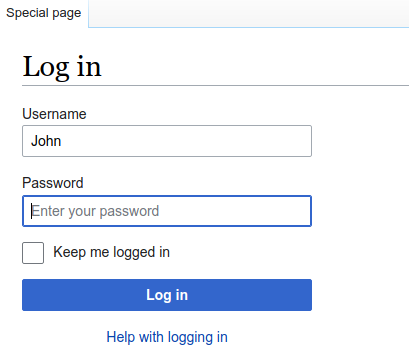
If you wish to edit a page, you will need to login to the wiki first. You do this by clicking on log in and entering the name and password you specified when you created LocalSettings.php.
Configuring Uploads
One use I like to make for a wiki is to upload appliance manuals. So I need to configure file uploads. I am using the information from Manual:Configuring file uploads.
Check the permissions for the folder /var/lib/mediawiki/images with the command chown -R www-data:www-data /var/lib/mediawiki/images/.
Adding PDF files
I wanted to be able to add manuals from different appliances to the wiki, so I made the following change.
Change directory to cd /tmp. Now download an extension with wget https://github.com/WolfgangFahl/PDFEmbed/archive/refs/heads/main.zip. Now cd /var/lib/mediawiki/extensions to move to the extensions folder. Extract the files with unzip /tmp/main.zip. Next rename the folder mv PDFEmbed-main PDFEmbed.
In your SSH window change to the folder /var/lib/mediawiki. Now make a backup of LocalSettings.php with cp LocalSettings.php LocalSettings.php.bak to save a copy of your working file.
Next open the file for editing sudo nano LocalSettings.php. Scroll to the bottom and add the following text.
# Add new types to the existing list from DefaultSettings.php
$wgFileExtensions[] = 'pdf';

# Added PDF embed extension
wfLoadExtension( 'PDFEmbed' );
Now save the file.
This will allow you to upload PDF files, like manuals to the wiki and display them in a PDF viewer window.
Written by John F. Moore
Last Revised: Fri Jan 30 01:16:30 PM EST 2026

This work is licensed under a Creative Commons Attribution-NonCommercial-ShareAlike 3.0 Unported License.