Table of Contents
Abstract
The Linux system follows an organized structure known as Linux File System (LFS) which defines where programs, libraries, and configuration files live. We will explore this structure and discuss how to optimize the layout for your next installation, as well as where to find programs. The LFS will naturally lead to a discussion of how to backup your Linux system for recovery. We will discuss what to back up and what to not backup. Finally we will look at backup tools and how to make your own.
Linux File System
A file system is an organization of data and metadata on a storage device. A filesystem contains the methods and data structures that an operating system uses to keep track of files on a disk or partition.
Linux follows single hierarchal directory structure. Everything starts from the root directory, represented by /, and then expands into sub-directories. Where DOS/Windows had various partitions and then directories under those partitions, Linux places all the partitions under the root directory by mounting them under specific directories.
One specific difference between a Linux/Unix system and Windows is the lack of drive letters. In the Windows world each hard disk partition is assigned a drive letter, typically C: thru Z: for hard disk partitions or network shares.
On a Linux system each hard disk partition is mounted to a directory on tree. One advantage to mounting is the ability to resize parts of your system by swapping in partitions. To make this clearer let me walk you through an example.
How to resize part of your system
Suppose your /home partition is /dev/sda5 with a size of 10 gig but you have used 9.75 gig of space. Now lets suppose you can create a new 20 gig partition on your hard disk. You could mount the new partition on a temp location lets pick /mnt/home for /dev/sda12. Now as the root user, you can use the following commands to copy your current /home to the new partition /mnt/home.
cd /home
find . -print | cpio -pv /mnt/home
Once the copy is finished you edit the file /etc/fstab and change the /home partition from /dev/sda5 to /dev/sda12. You can restart your system to change the mount to the new location.
You will now find you have 20 gig of space in /home.
Linux File System Diagram
Lets have a look at the file system as a picture.
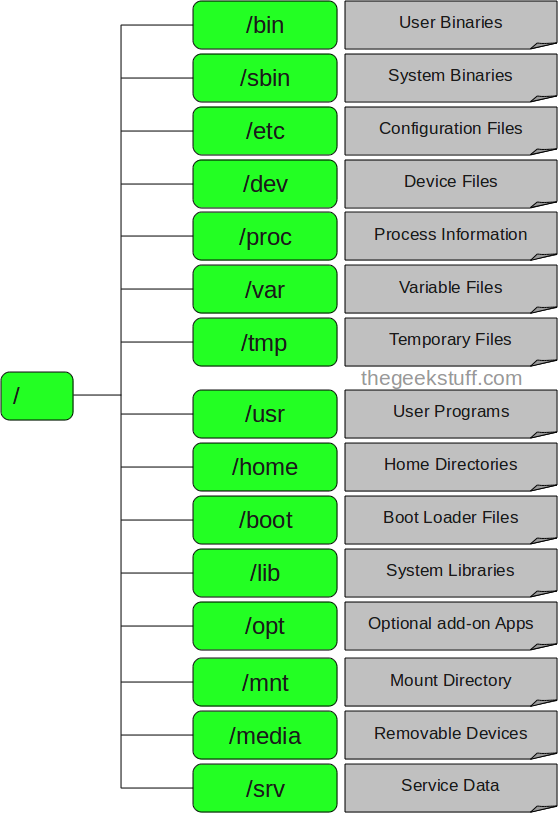
File System Hierarchy
For a quick reference on the File System Hierarchy check out your man pages with the command man hier. Sometimes you might be surprised at the amount of documentation on your own system.
Mount a USB Memory Stick
Most of the time a Linux system will mount a memory stick automatically when you connect it to the computer. But what do you do if the system does not automatically mount a memory stick.
Look for the partitions on the memory stick:
sudo fdisk -l. This will list all the disk partitions it sees. If your hard disk is /dev/sda then you should look for /dev/sdb partitions. Lets assume you see /dev/sdb1 with a partition type of vfat.Next make sure you have a mount point available to use. I am going to use /mnt/usbstick, if this does not exist you can create it with
sudo mkdir /mnt/usbstick.Now to mount the device we will use the command line:
sudo mount -v -t vfat /dev/sdb1 /mnt/usbstick. The -v is for verbose output, the -t is to specify the file system type we got from fdisk.
Understanding Unix/Linux File System
Here is a link with more details about the File System. Specifically it will explain more about Superblocks, file system types, inodes and links. This is more advanced than beginner information but is useful if you want a more detailed look. Explore Understanding UNIX / Linux File System
Backup Linux System
The first step in planning a backup is to decode how you are going to organize your restore. Now if you are confused about how to organize your restore, that is what we are going to discuss. Now there are many more ways of organizing a restore than the one I am going to propose. But if you understand how to make the decision on the restore you will be better able to decide your own strategy.
Types of Restores
The first understanding is the different types of rescues. Let me give you a few examples.
1. You accidently deleted a file from your home folder.
This is the easiest type of recovery.  All you need to do is go back
to your last backup, locate the file and restore it.
2. You had a corrupted disk or you deleted a critical folder in the operating system.
You need to go back to the installation media and recover the
files you need.  To do this you want to follow the instructions
from the operating system restore process.
3. Your hard disk failed and you lost the whole system.
Once you replace the hard disk you are going to need to reinstall
the operating system, then restore your applications, and finally
restore from your backup.
What to backup
Before you do a backup we need to decide what we need to put on the backup media. The idea is to backup only the parts of the system which you can not restore from the install CD. The reason for a selective backup is to both save space on the backup and to make the backup faster.
Home Folder backup
The most obvious target for the backup is your home directory. But again there is no reason to backup things like the browser cache or the GUI configuration files.
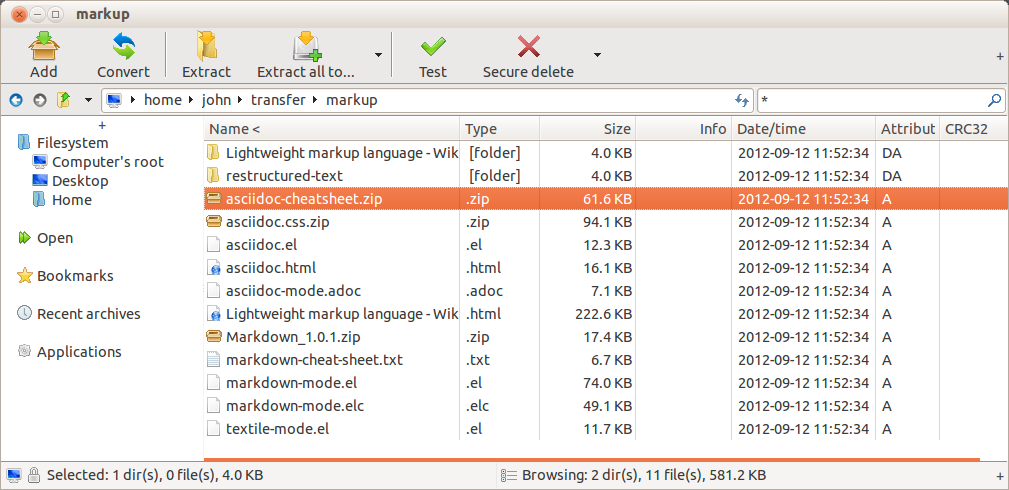
Here is a list of the files and folders in my home directory on this computer
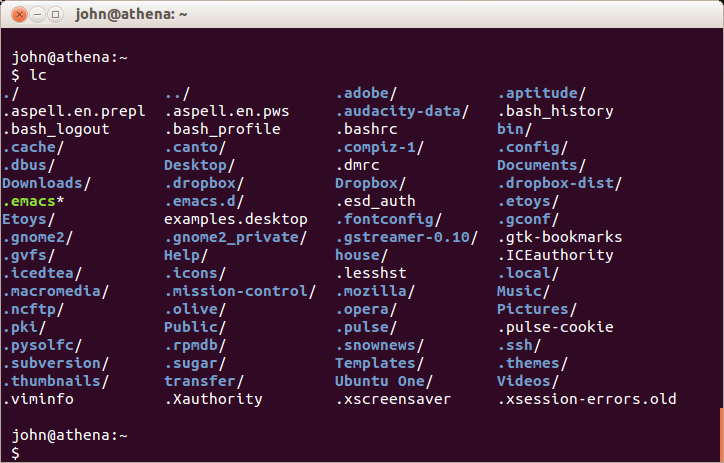
From looking at this directory listing I would backup the following directories and files.
.bash These are the configuration files for the shell
Document is the place where the document files are saved by default
Downloads Where the web browsers store the files downloaded
.emacs the configuration file for the emacs editor
house where I store some important files
Music is the location for downloaded music files
.ncftp configuration files and bookmarks for ncftp
Pictures were I save photo’s on my computer
.ssh validation keys for use with ssh and sftp
transfer where I save some files of interest
Now my list is probably not like your list. But you get the idea of what type of files we want to backup.
Next we need to decide if there are specific files that should be included. For example the bookmark files for the three browsers I use are available in
Chromium: /home/john/.config/chromium/Default/Bookmarks
Opera: /home/john/.opera/bookmarks.adr
Firefox: /home/john/~/.mozilla/firefox/6cpl8xeq.default/bookmarkbackups/*
System Configuration Files
These files contain the system configuration that define how the system works. Many of the configuration files exist in the /etc directory.
Creating your own backup script
We have two sets of files to backup. To start we need a backup medium. For this example I will use a memory stick formatted as vfat, located at /mnt/usbstick and we will assume this script is being run manually.
#!/bin/bash
# Backup script of /home/john files to a memory stick at /mnt/usbstick

echo -n "Is the USB memory stick mount at /mnt/usbstick ( Y or N ): "
read ANS
if [ lc( $ANS ) eq "n" ]
do
        echo Please insert the memory stick into a USB slot. Press return to continue.
        read ANS
        sudo mount -v -t vfat /dev/sdb1 /mnt/usbstick
done

DATESTAMP=`date %Y%m%d`

cd /home/john
tar czvf /mnt/usbstick/home-backup.${DATESTAMP}.tar.gz ./.bash \
./Document ./Downloads ./.emacs ./house ./Music ./.ncftp \
./Pictures ./.ssh ./transfer

# flush the buffers onto the memory stick.
sync ; sync

# Unmount the USB memory stick.
sudo umount -v /mnt/usbdrive

echo "You can remove the Memory stick now"
exit 0
This script till mount a USB memory stick, change directory to the /home/john, then use the tar command to create an archive. Since we are including the DATASTAMP in the file name each backup will be unique unless you decide to do more than one backup in a day.
If you would like you can use the zip command instead of the tar command by replacing tar czvf /mnt/usbstick/home-backup.${DATESTAMP}.tar.gz with zip -r /mnt/usbstick/home-backup.${DATESTAMP}.zip both archive programs are installed in Ubuntu.
Backup Media
In the past it was common to use magnetic tape to backup a hard disk. The reason was that tape was cheap and reusable. Tape can still be used but these days there are more options.
USB Hard Disk is one option that is proving to be inexpensive due to the low price of hard disk. The advantage of a USB hard dis is that you can move it around from computer to computer. Or you can store it some place safe, like in a safe, or at a friends house.
Online Storage has become much more available from multiple sites. Since you are storing your backups online you don’t need to worry about disaster claiming your backups. You can use sites like Ubuntu One or DropBox or SpiderOak.
Solid State Storage has come down in price and is easy to use. Whether we are talking about a USB memory stick, or an SD card or Solid State drives, they offer convenience and small size.
Backup Tools on Ubuntu
This is not intended to be a complete list but just a couple of suggestions
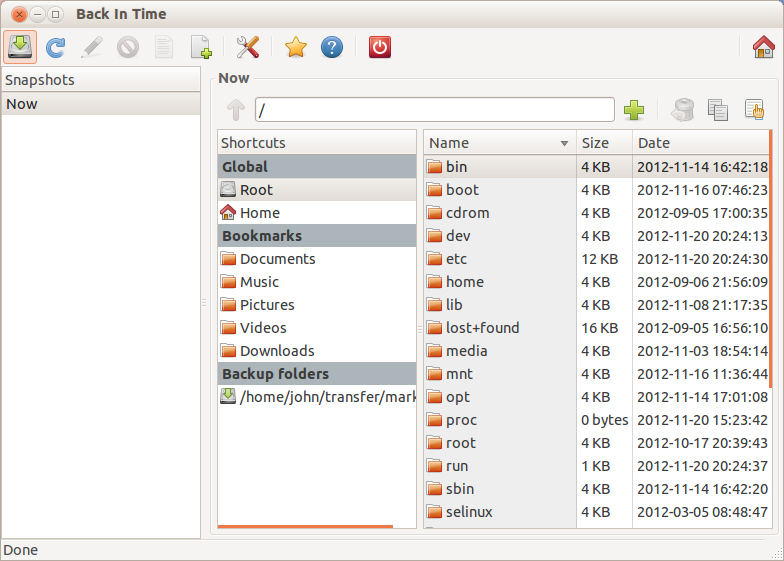
Back In Time is a simple backup tool for Linux inspired from “flyback project” and “TimeVault”. The backup is done by taking snapshots of a specified set of directories.
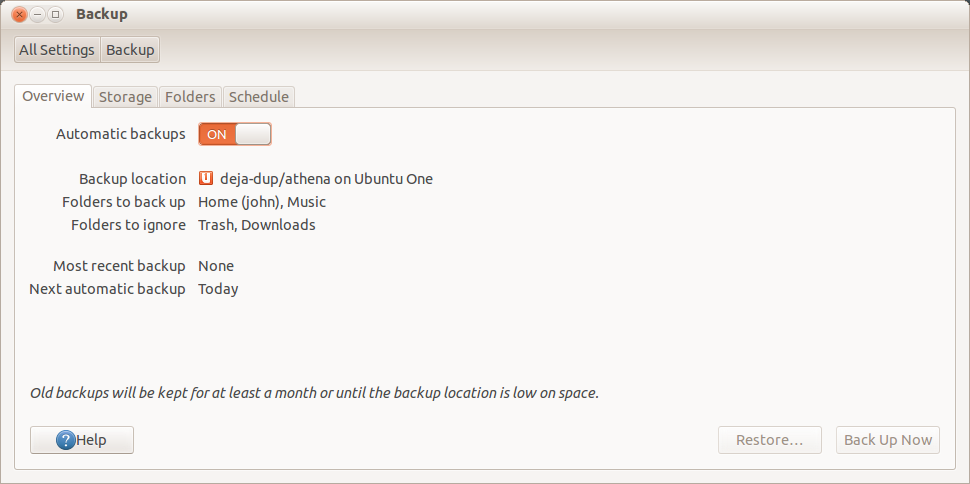
Déjà Dup is a simple — yet powerful — backup tool included with Ubuntu. It offers the power of rsync with incremental backups, encryption, scheduling, and support for remote services.
With Déjà Dup, you can quickly revert files to previous versions or restore missing files from a file manager window. It’s a graphical frontend to Duplicity, which itself uses rsync. It offers the power of rsync with a simple interface.
PeaZip is a free file and archive manager, based on solid and proven Open Source technology of 7-Zip for handling mainstream archive formats, and other great Open Source tools (like FreeARC, PAQ, UPX…) for supporting additional file formats and features, in order to provide an all purpose zip utility featuring a powerful unified GUI that, unlike most of other classic file archivers like i.e. WinZip and WinRar, is natively portable and cross-platform.
Picking your own
Lastly I am going to leave you with a fairly recent article about online backups. Have a good read of 5 Online Backup Solutions for Ubuntu Linux as a good discussion of online backup.
BACKUP or LOSE IT
Need I say more?
Written by John F. Moore
Last Revised: Tue 01 Sep 2020 08:10:06 PM EDT

This work is licensed under a Creative Commons Attribution-NonCommercial-ShareAlike 3.0 Unported License.