Home Network Windows Configuration
At this point we have configured the Linux server with Samba so it will talk to both Windows and Linux. Now it is time to configure windows so it can see the Linux Server.
I will assume that you already have a networking card in your computer and that you have installed TCP/IP for it. If not please do that now before we begin the configuration.
IP address
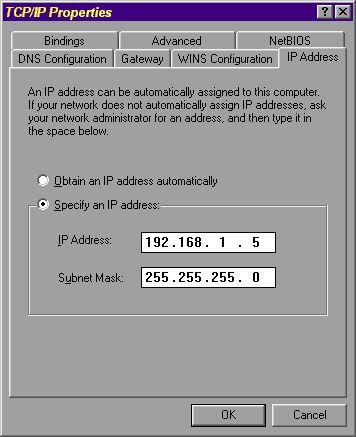
Lets start by going to the control panel and starting the Networking program. Once it starts, select TCP/IP from the list and click on properties. Now we are setting up the computer Apollo for Frank so we find the IP address we selected and enter it in the windows. We will also be entering the Netmask selected for the system. You should end up with a window looking something like this:
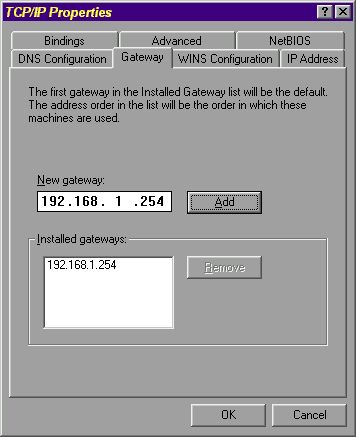
Now you should click on the tab marked Gateway. This is where we will enter the IP address of the firewall. This address will allow us to use the firewall to get to the Internet. Once the IP address is added the windows should look like this:
Once we have finished this configuration of the Networking parameters, click the OK button. This will likely restart your computer and ask you for the Windows CD. Complete the install.
Setting the Computer name and Workgroup
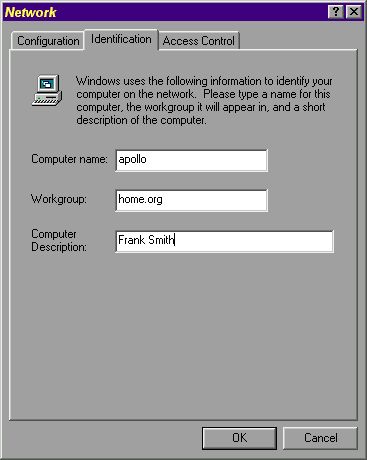
Start up the control panel and select the Network program. Click on the tab marked “Identification”. Fill in the spots for Computer name, Workgroup, and Computer Description as shown below.
Set the computer for Plain Text Passwords
Although Samba can deal with encripted passwords, I have found it easier to use plain text passwords. This is enabled by using the program regedit .
Here are the instructions from the Samba documentation:
    REGEDIT4

    [HKEY_LOCAL_MACHINE\System\CurrentControlSet\Services\VxD\VNETSUP]
    "EnablePlainTextPassword"=dword:00000001
To make this change go to the Start button and select Run. In the window type the name regedit , and click on OK. Once the program starts you will need to keep opening the tree until you get to the folder VNETSUP. The navigation tree will look something like this:
    HKEY_LOCAL_MACHINE
        System
             CurrentControlSet
                   Services
                        VxD
                           VNETSUP
Now go to the Edit menu and select ADD a dword. Enter the name: EnablePlainTextPassword and press <Enter> . Next right click on the item, and select modify. Change number value from zero to one. Close the program. You do not need to save, it was saved while you were making the changes.
Create a Login on Windows
To do this, go to the start menu and select the Shutdown option. In the menu choose Log off . The system will close down windows, and return a login box. Enter the name frank and the password magic , click on OK. It will ask you to confirm the password the first time so enter magic again and click OK.
Configure the hosts file
Even though this is a Windows box and not a linux box, we can use a hosts file for name lookup. If you check, you will probably find the file \windows\hosts.sam on your system. This is a hosts sample file for windows. So lets use notepad to create the file \windows\hosts. For our example it should look like this:
    # Copyright (c) 1998 Microsoft Corp.
    #
    # This is a sample HOSTS file used by Microsoft TCP/IP stack for Windows98
    #
    # This file contains the mappings of IP addresses to host names. Each
    # entry should be kept on an individual line. The IP address should
    # be placed in the first column followed by the corresponding host name.
    # The IP address and the host name should be separated by at least one
    # space.
    #
    # Additionally, comments (such as these) may be inserted on individual
    # lines or following the machine name denoted by a '#' symbol.
    #
    # For example:
    #
    #      102.54.94.97     rhino.acme.com          # source server
    #       38.25.63.10     x.acme.com              # x client host

    127.0.0.1           localhost
    192.168.1.254       samson.home.org
    192.168.1.1         wizard.home.org
    192.168.1.5         apollo.home.org
    192.168.1.7         demeter.home.org
Look for the Linux Server
If everything went well, you should now be able to go to the network neighborhood and see your Linux Server Wizard listed. When you open up Wizard, you should find a directory labeled Public, one named temp, and one named frank. The first one is the public location you configured under Samba. The second folder is a location to copy files to share between Windows computers. The last folder, frank, is the Unix directory /home/frank which you configured for the user.
Congradulations, you have a Windows File share working under Linux.
Written by John F. Moore
Last Revised: Tue 01 Sep 2020 08:10:11 PM EDT

This work is licensed under a Creative Commons Attribution-NonCommercial-ShareAlike 3.0 Unported License.