Cygwin Installation

These instruction assume you want to install the cygwin basic library on your windows computer.
I will explain the basic steps to doing your first installation of a base system. You can perform this installation either from the internet of from the CD available.
Download from the Internet
Lets assume you want to do an installation from the internet. Later I will describe the differences using the CD.
- After you connect to the internet point your browser at the Cygwin Website . Down load the program setup.exe from their web site to a local directory.
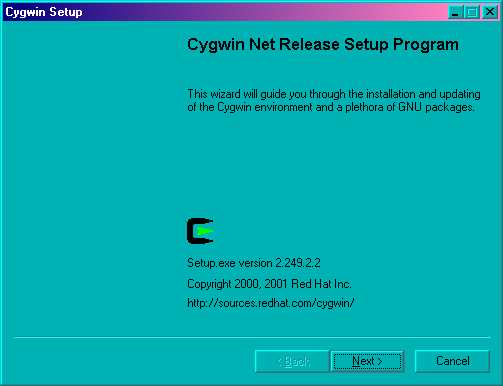
- Once you have the file setup.exe downloaded, you should execute the program. It will bring up a signin window something like this:
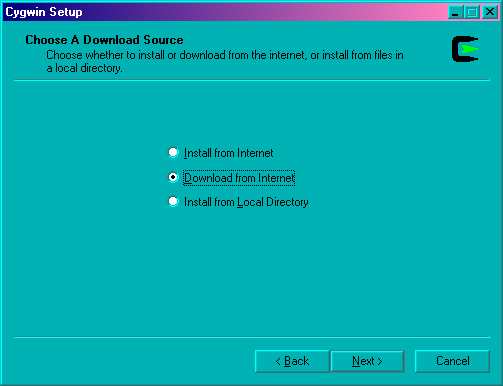
- Click on Next to proceed. I recommend you use the option Download form Internet to capture the files locally. Click on Next to proceed.
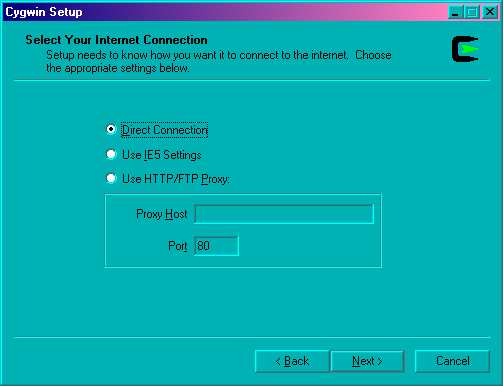
- If you have a normal windows connection to the internet you can use the Direct Connection to capture the files. You are welcome to use the “Use IE5 Settings”, but I have no experience with it. Click on Next to proceed.
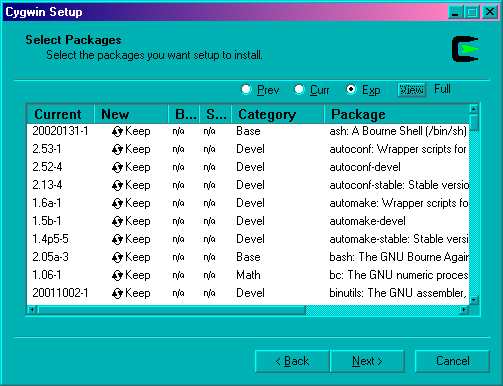
Now you need to select what to install. You can change what you view by clicking on the view button to select Category . Initially I would simply select the following packages:
- Base
- Archive
- Editors
- Text
- Games
- Utils
- Web
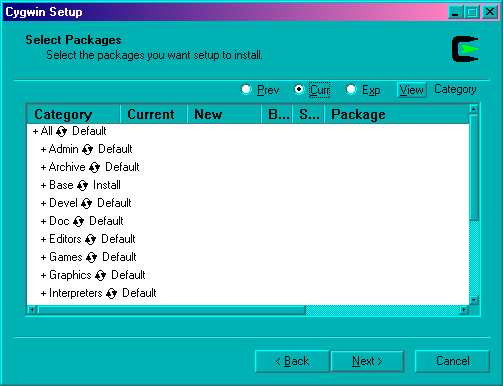
Package Select
When you finish selecting click Next to continue.
OR if you are feeling like you want finer control of what to install, click the view button to select Full. Here is the list of packages I recommend you start with.
- bash
- bzip2
- clear
- cpio
- cygwin
- diff
- file
- fileutils
- findutils
- fortune
- grep
- gzip
- less
- libncurses5
- libncurses6
- libreadline4
- libreadline5
- lynx
- man
- ncurses
- newlib-man
- perl
- sh-utils
- sharutils
- tar
- termcap
- terminfo
- textutils
- unzip
- vim
- which
- zip
Package Select Individual
When you finish selecting click Next to continue.
For those of you curious as to what all these package names mean, take a look at Cygwin Package List, for brief descriptions.
At this point the installation should show you how it is progressing with the download. There is nothing to do until it finishes downloading the files. Go have a cup of coffie and relax, this will take a while, even if you have a fast connection.
Installing Cygwin from a Local Directory
At this point I will assume you have downloaded the Cygwin application to a local directory. I will assume that you have the files saved in a directory named c:\download\cygwin . I will assume that you want to install the cygwin distribution into the directory c:\cygwin . If you wish to use different directories, just substitute your directories for the ones specified here. If you have one of the CD’s you will use that as the source directory.
For this installation you do not need to be connected to the internet. So if you are still connect to the internet, you can hang up now.
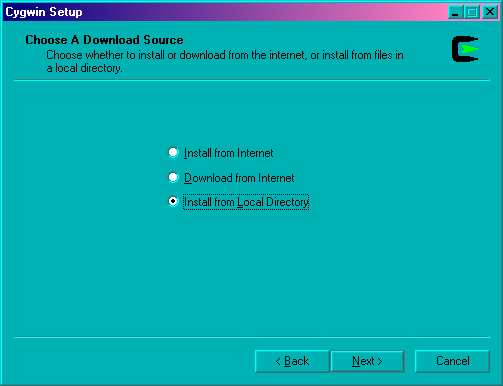
- Begin by starting the program setup.exe again. It will bring up a signin window something like this:
- Click on Next to proceed. This time you should check the line labeled Install from Local Directory . Click on Next to proceed.
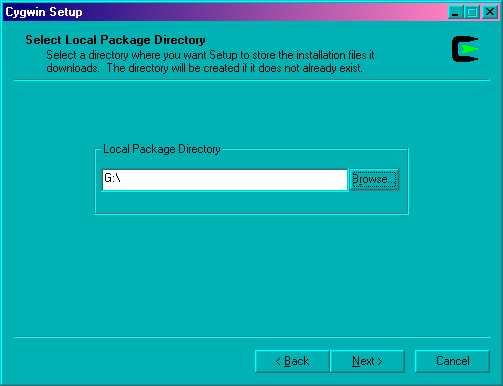
- On this window you select the location you placed the downloaded files. If everything is going well, the directory will already be selected for you. Click on Next to proceed.
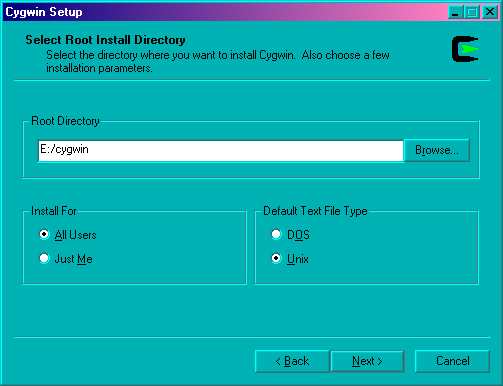
- The next step is to select the directory you want as the root for your installation. I had recommended c:/cygwin , but the installation can go anywhere you want. I recommend the options Install for All users and Default text file type Unix . The install for all users, probably will not matter since you are probably the only user on your computer. The option, “Default text file type Unix” will force you to use the Cygwin tools on the text files instead of the windows tools. Click on Next to proceed.
Now you need to select what to install. You can change what you view by clicking on the view button to select Category . Initially I would simply select the following packages: NOTE: yes this just like the step above. But this time you will be installing the packages not just downloading them.
- Base
- Archive
- Editors
- Text
- Games
- Utils
- Web
Package Select
When you finish selecting click Next to continue.
OR if you are feeling like you want finer control of what to install, click the view button to select Full. Here is the list of packages I recommend you start with. W
- bash
- bzip2
- clear
- cpio
- cygwin
- diff
- file
- fileutils
- findutils
- fortune
- grep
- gzip
- less
- libncurses5
- libncurses6
- libreadline4
- libreadline5
- lynx
- man
- ncurses
- newlib-man
- perl
- sh-utils
- sharutils
- tar
- termcap
- terminfo
- textutils
- unzip
- vim
- which
- zip
Package Select Individual
When you finish selecting click Next to continue.
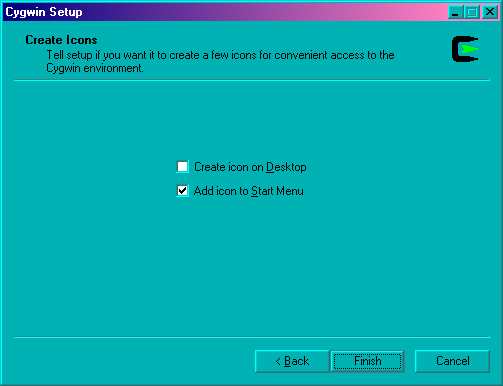
Now starts a long wait while the software is being installed. This will not take nearly as long as the download, so don’t go too far away. When the installation is finished, it should present a window asking how you what icons you want. I recommend checking both boxes to make this program easier to start. Click the Finish button to complete the installation.
You are done. You should find an icon like this ![]() on your screen. You double click it to start the shell.
on your screen. You double click it to start the shell.
Enjoy your new environment, it will give you a powerful command line upon which to start you learning process. I highly recommend Rute User’s Tutorial and Exposition as a good tutorial for learning about Linux.
Written by John F. Moore
Last Revised: Tue 01 Sep 2020 08:10:10 PM EDT

This work is licensed under a Creative Commons Attribution-NonCommercial-ShareAlike 3.0 Unported License.