Abstract
Google created the AIY Voice kit to promote the use of Google Assistant. So how does it work and what can I do with it. Lets find out together as we explore how it works.
What is an AIY Voice Kit?
AIY (Artificial Intelligence Yourself) is a collection of simple parts which allows you to interface to the Google Assistant or create your own voice recognition apps.
DO-IT-YOURSELF ARTIFICIAL INTELLIGENCE
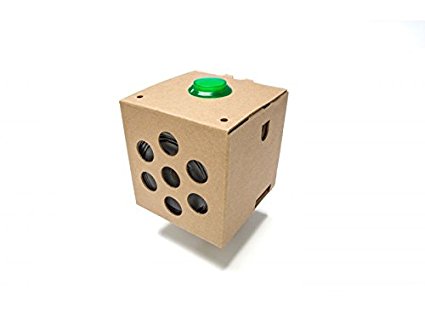
Google AIY Projects brings do-it-yourself artificial intelligence to your maker projects. With this AIY Voice Kit from Google, you can build a standalone voice recognition system using the Google Assistant or add voice recognition and natural language processing to your Raspberry Pi based projects. Google AIY Voice Kit
This project demonstrates how to get a natural language recognizer up and running and connect it to the Google Assistant, using your AIY Projects voice kit. Along with everything the Google Assistant already does, you can add your own question and answer pairs. All in a handy little cardboard cube, powered by a Raspberry Pi. Project Overview
Assemble the Kit
Since they provide good instructions, there is no reason to repeat them here.
Create the SD card
For the SD card you need to first download the image from Voice Kit SD image, and save to your local drive. This is a compressed image to conserve download size. Even so it is over 1 gig in size.
Since I am running under Linux I am able to unzip the image using the Archive Manger under Ubuntu 16.04. The next step is to burn the image to the SD card. For this I used the old standby dd with the following command.
sudo dd bs=1M if=AIY-Voice/aiyprojects-2018-02-21.img of=/dev/sdbIf you are doing this under Windows, you will need 7zip or Winzip to convert the .img.xz file to a .img file. You can then use the recommended tool Etcher.io to burn the image to an micro SD card.
First Boot
When I started the system I made a few configuration changes to make it easier to work with this box.
I ran the command sudo raspi-config to make the following changes and modifications.
I changed the password for pi since SSH is complain it it is not changed
I changed the name of the box to lionvoice to make it easier to find on a network using DHCP.
I went to Localization and enabled en_US.UTF-8 UTF-8 characters. I prefer US english to british english.
I went to localization and changed the Time Zone to US Eastern.
I went to localization and changed the Wi-fi Country to US.
I went Interfacing options, and enabled SSH. This will allow me to remotely access the box from another computer.
I went to advanced options and expanded the Filesystem. I am using a 16 gig card so I might as well use the additional space.
I went to update to bring the system up to date.
I then rebooted the system.
Check the Audio
This is really easy from the desktop you just double click on the document Check Audio and follow the instructions. For those of you that are curious, this executes the script: /home/pi/AIY-projects-python/checkpoints/check_audio.py to run the check.
Setting up your device
For this we are going to follow the instructions in the Users Guide by following the steps Setting up your device.
Creating a project
I went to the website for projects Google Cloud and created a login. I then followed the instructions from the User Guide to create the project wpcug test1.
The next step is to enable the Google Assisstant API.
Once you enable it you need to create OAuth 2.0 client. I created a client named wpcug test1.
I moved the json file from ~/Download to /home/pi and renamed it assistant.json.
Activity Controls
Next we go to the Activity Controls window in the web browser. We are checking that the following services are enabled.
Web and app activity
Device information
Voice and audio activity
Using Your Device
Finally we are going to click on Using Your Device for instructions on how to start.
For the first test I will cd to AIY-projects-python and execute the python script:
We now have a Google Assistant able to answer questions using voice commands. I have not attempted to find out all that the assistant can do, but there is a web page of ideas at Make Google.
Using the button instead of “OK Google”
Another mode of use for the assistant, especially for those afraid that Google is always listening, is the arcade button. This works the same as “OK Google” except it only listens to you after you push the button.
To run this script, from a terminal cd to AIY-projects-python and execute the python script:
![]()
Maker’s Guide
This is a hackable project, so we encourage you to make this project your own! We’ve included a whole section on replacing the Google Assistant SDK with the Cloud Speech API to give you even more options. This guide gives you some creative extensions, settings, and even a different voice API to use. Maker’s Guide
Turn on Billing
Since the voice recognization engine used by Google is a commerical product you need to enable billing to make use of it. You can get up to $300 for the first year. But if you use less than one minute per month there is no charge. So I am not planning on gettng billed for my use experimenting.
Once you have followed the instruction in Custom Voice Interface, you should be ready to go.
The first thing to do is to double click on Check Cloud icon or execute
checkpoints/check_cloud.pyto make sure things are setup correctly. If all goes well you are ready to experiment.
Trying out the Cloud Speech
To try out the cloud, you open a terminal window and cd AIY-voice-kit-python before running the command:
You will now see the speech you say displayed back to you. There are also 4 build in commands:
| VOICE COMMAND | RESPONSE |
|---|---|
| turn on the light | The LED is turned on and is solid |
| turn off the light | The LED is turned off |
| blink | The LED starts blinking |
| goodbye | The app automatically exits |
Hacking the Voice Control Board
Since there is some good information available from youtube, I thought I would allow someone else to present some ideas.
For those who are interested in the code the project source is available on GitHub: https://github.com/google/aiyprojects-raspbian.
Written by John F. Moore
Last Revised: Fri Jan 30 01:16:29 PM EST 2026

This work is licensed under a Creative Commons Attribution-NonCommercial-ShareAlike 3.0 Unported License.