Lenovo Ideapad S10-3T
Netbooks and Linux Intro
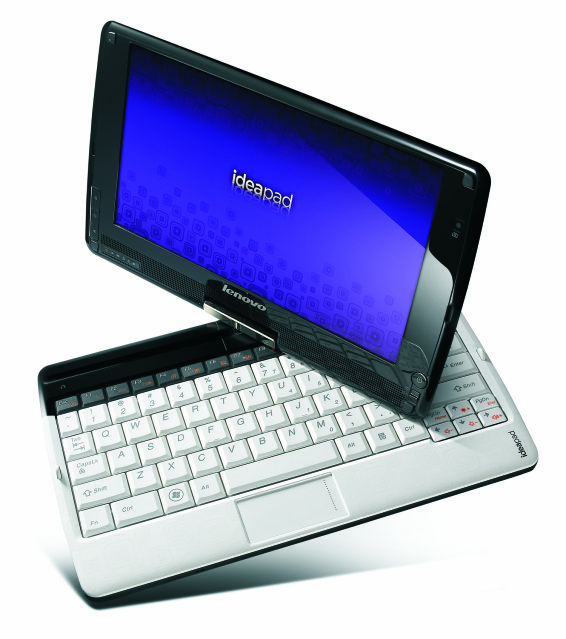
Before we get started I am going to discuss this computer. I am not here to try to sell you on this specific netbook computer, but it will help to understand a typical netbook. Since this netbook also can be configured as a tablet computer, we will touch on that.
This computer is typical in that it is small enough to carry around under your arm like a book. It starts up and stops relatively quickly, not nearly as fast as some of the netbooks. But on the other hand, it has a hard disk covering 250 Gig of space. The battery is good for about 5 hours operation, and it has a reasonable keyboard. The screen is 10.1 inches, and the processor is an Intel Atom. It came with 1 gig of ram, which is OK for Linux but light for use with Windows 7, the Operating System it came with.
The system comes with a built in SD card reader, a camera, which works with Skype, a touch pad which leaves something to be desired, and a built in microphone which I have not been able to enable.
I have not found this machine to be a total replacement for my everyday use. The small screen, and the lower resolution is a bit confining. This is especially obvious when I am used to working on a 24 inch monitor with a resolution of 1600x1200 instead of the 1024x600 available on this monitor. But dispite the limited resolution, it still works as a portable gateway to the internet.
Before we start looking at the linux versions I thought I would discuss a couple of issues involved with installing and configuring linux on a netbook.
How to Install a CD on a Netbook
UNetBootIn
One of the first questions you need answered to install Linux on a Netbook is how do I install something which is normally installed from a CD onto a computer which has no CD?
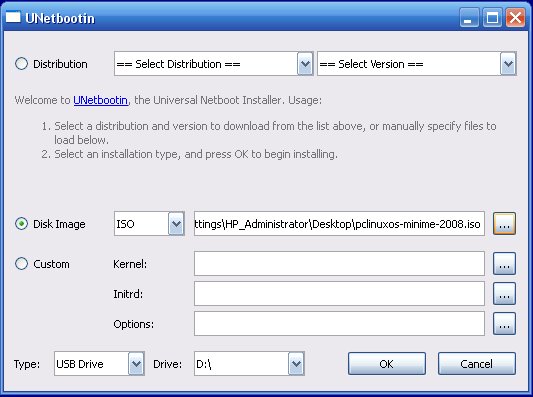
The answer is a little program called UNetBootIn. This program can take an ISO file, like you would download from Ubuntu, and write it to a memory stick.
The program runs on both Windows and Linux. It is capable of installing a number of versions of linux from the selection drop box at the top of the window. But it is also able to take most ISO files and convert them for installation on a memory stick.
The pattern that I find works best under linux for creating an installer is the following.
Insert the memory stick into the computer and let the operating system mount it.
In linux, open a Terminal, and unmount the memory stick. This frees the device for formating. ie, do a
mountto find where the device is mounted. This will give you the location often something like:/dev/sdb1 on /media/KINGSTON type vfat. Then use the command
umount -v /dev/sdb1to unmount the device.Next you should format the device in vfat format using the command
mkdosfs /dev/sdb1.Note
Make sure you have the correct device name. I used /dev/sdb1 because that is where it is on my system. If you use the wrong device name you will delete your data.
Once the formating is done, you need to remount the device so unetbootin can work with it. I have a directory for this named
/mnt/stickfor this purpose. So the command would be:mount -v -t vfat /dev/sdb1 /mnt/stickNext run
unetbootinand point it to the device /dev/sdb1 and the ISO file containing the operating system. When it is finished you are done.
Once this is done, you are ready to reboot your computer. You need to make sure that your computer is set to boot from a memory stick. If not this install method will not work. Most of the netbooks are setup this way since that is the only way to install software.
Recover MBR
One problem that comes up over and over when installing windows, is that it over writes the MBR (Master Boot Record). This disables grub or lilo so you can not get back to your linux installations. After some digging I found the following method.
Before you perform this operation, you need a rescue memory stick. The method I recommend is to use the Trinity Rescue Kit. Download the ISO file and use unetbootin to install it on a memory stick. This is a good rescue to keep handy for any emergency on your computer.
| Address | Description | Size in bytes | ||
|---|---|---|---|---|
| Hex | Oct | Dec | ||
| 0000 | 0000 | 0 | code area | |
| 01B8 | 0670 | 440 | disk signature (optional) | |
| 01BC | 0674 | 444 | Usually nulls 0x000 | |
| 01BE | 0676 | 446 | Table of Primary Partitions | |
| (Four 16-bypte entries, IBM partition table scheme | ||||
| 01FE | 0776 | 510 | 55h | |
| 01FF | 0777 | 511 | AAh MBR signature 0xAA55 |
Once you have Linux running you can save the boot record with the command: dd if=/dev/hda of=/boot/boot.MBR bs=512 count=1 It can then be restored with: dd if=/boot/boot.MBR of=/dev/hda bs=512 count=1
or if you do not want/need to overwrite the partition table with: dd if=/boot/boot.MBR of=/dev/hda bs=446 count=1 as the partition table is kept in the last 66 bytes of the MBR.
So here is a set of steps you would perform to backup the MBR before installing windows. Then after installing windows, you use the Rescue memory stick and commands to restore the MBR.
Create a rescue memory stick using unetbootin and the Trinity Rescue ISO file. This will be your recovery tool.
Open a terminal window. Run the command
sudo -ito become the root user. Next, cd to /boot directory and run the commanddd if=/dev/hda of=/boot/boot.MBR bs=446 count=1to create a backup of the Master Boot Record in the /boot directory.In the terminal run the command
mountto see which partition contains the /boot directory. You should write this partition down so you can return to it later. You will need this device name when you want to restore the MBR.Install windows on your netbook. Finish the install of windows, and turn off the computer.
Insert the Rescue memory stick and boot the computer. You should end up looking at a command line.
Mount all the drives using the command
mountallfs. This will mount all the partitions to specific locations. Next, do a cd to the partition which contains your boot.MBR file.Now you are ready to restore the MBR, execute the command:
dd if=/boot/boot.MBR of=/dev/hda bs=446 count=1. Once this is done you should be able to reboot and see your grub menu again.
How to disable the Touchpad
One problem I have had with laptops, and expecially these small netbook computers is accidentially touching the touchpad when I am typing. This often causes the mouse to jump some place I don’t want it to go. I typically use an external mouse or trackball.
So if you have an external mouse or trackball you can disable the touchpad by removing the module which drives the touch pad. As a root user run the command: rmmod psmouse to remove the module which interfaces the touchpad to the computer. If you want to re-enable the touchpad use the command: modprobe psmouse to reload the module.
Netbook Operating Systems
I think the way to explore the different versions of Linux on a netbook is going to be to see them and do a brief show and tell with each of the 6 I have on this netbook.
So the attack that I am going to take is to show a few screen shots here. But in the meeting I will try to boot into each of the Linux Versions and show a how they work. There is no way this is going to be an exhaustive review of these operating systems. It is meant more as a quick look.
Windows 7
Windows 7 Screen
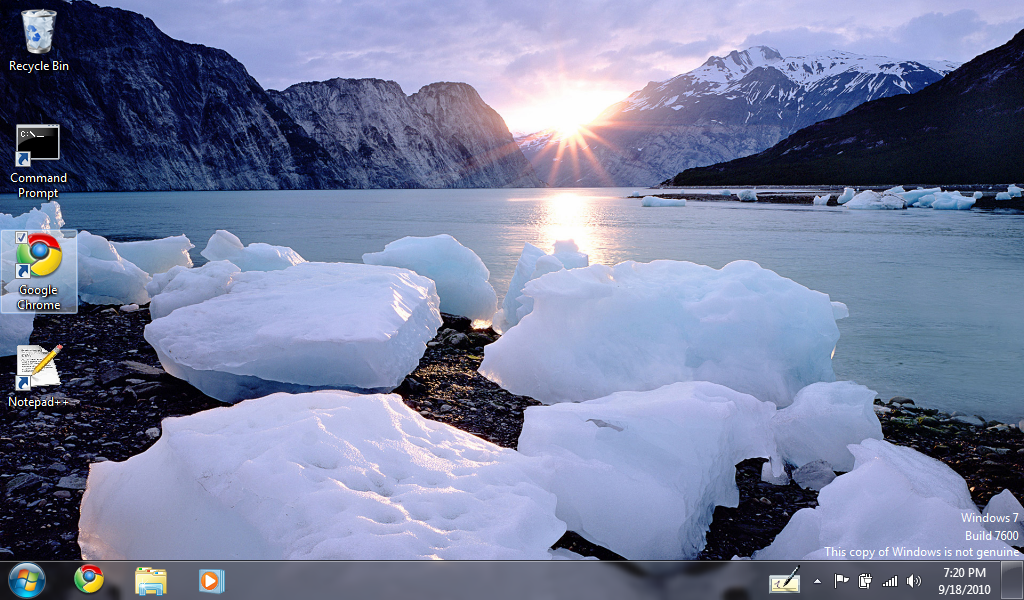
Yes, I know I said I was going to discuss Linux Operationg Systems on the netbook. But I thought it might be fun to show what Windows 7 looks like on the same netbook.
As a point of interest, this is a 64 bit version of Windows 7. It turns out the Intel Atom processor is actually a 64 bit processor, although it works find on 32 bit operating systems. The biggest problem with the netbook is that it will only handle a max of 2 gig of ram, and Windows 7 64 bit wants 4 gig. But it is running on 1 gig of ram in this picture. In reality it is seriously taxing the system to run on 1 gig of ram.
Fedora 13
Fedora 13 Whole Screen
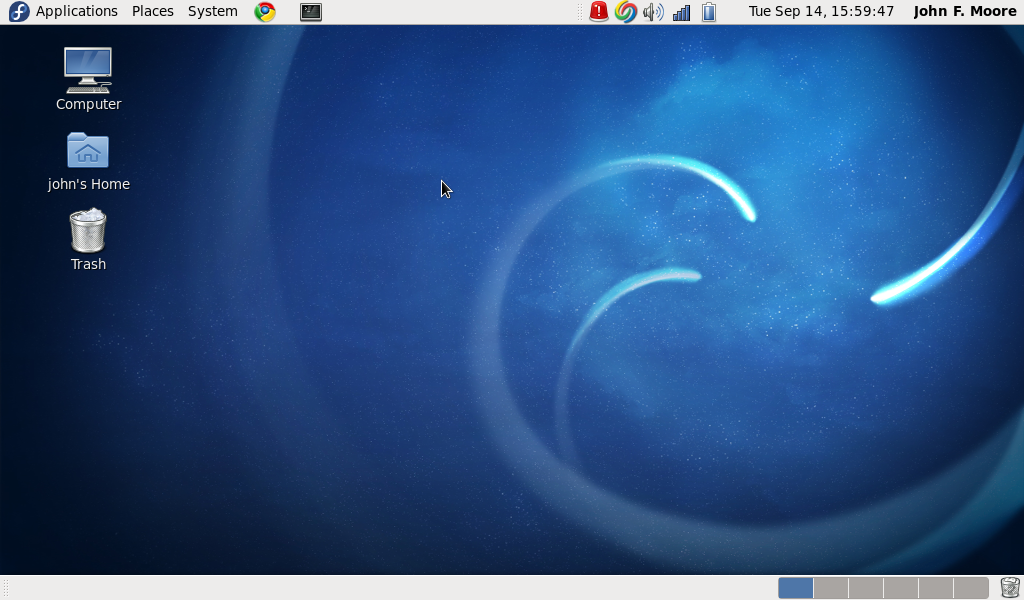
Fedora is a good OS for those familiar with the Redhad method of maintaining the system. The Gnome desktop is a fairly common windows style. The menu for application is at the top of the screen Applications. Next is the Places drop down menu for file explorer windows, starting in different location under your home directory. Third is the System drop down menu for Preferences and System functions.
At the bottom of the screen are the 6 screens available. One interesting icon is the Red Light at the top. This is reporting a crash in the secure linux application, a firewall application useful for security.
Fedora Avant Navigator
This is the Avant selector running under Fedora. It allows you to select which of the running applications to run. It is particularly useful if you are using a touch screen since teh icons are large enough for fingers.
Gentoo Linux
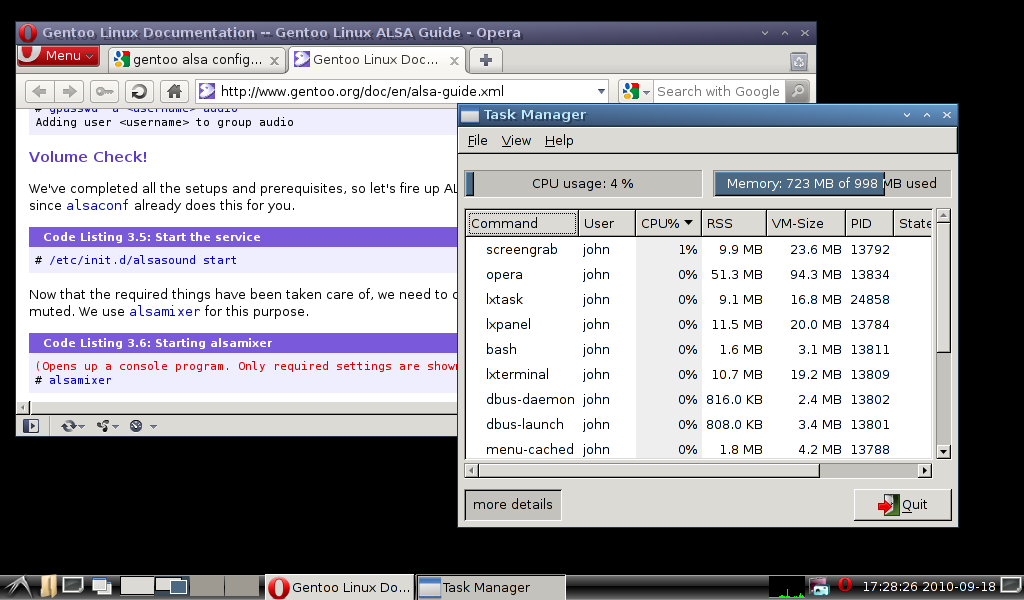
Gentoo LDE Window Manager
Gentoo is a version of linux designed for the more sophisticated linux user. The install process is highly complex, and the application are added individually. This Window Manager is quite lighter weight than the standard Gnome Window Manager, but requires less horsepower to use.
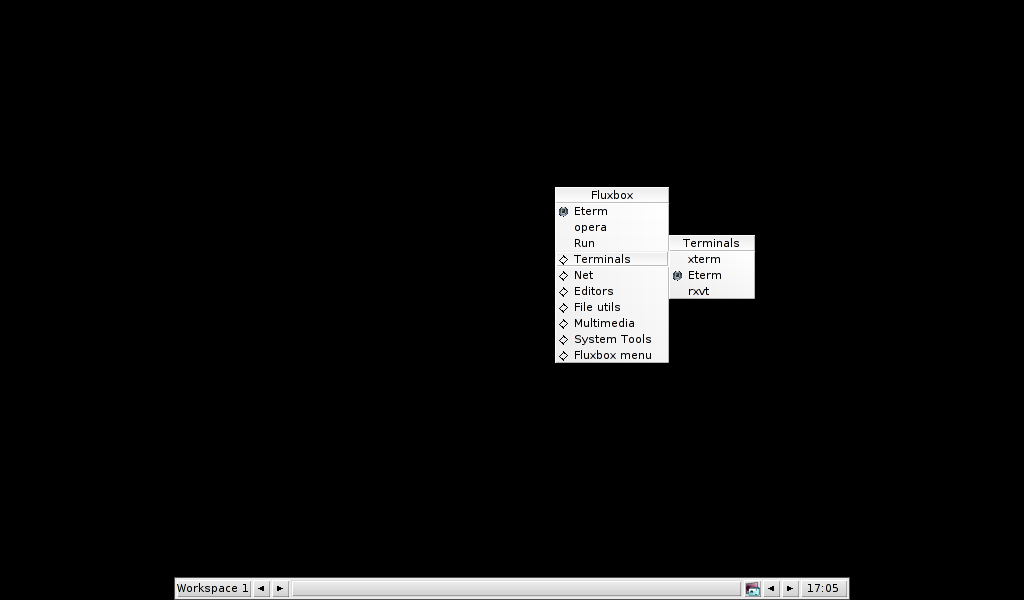
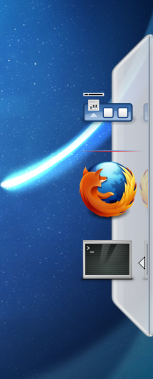
Gentoo Fluxbox Window Manager
Gentoo Fluxbox Window Manager
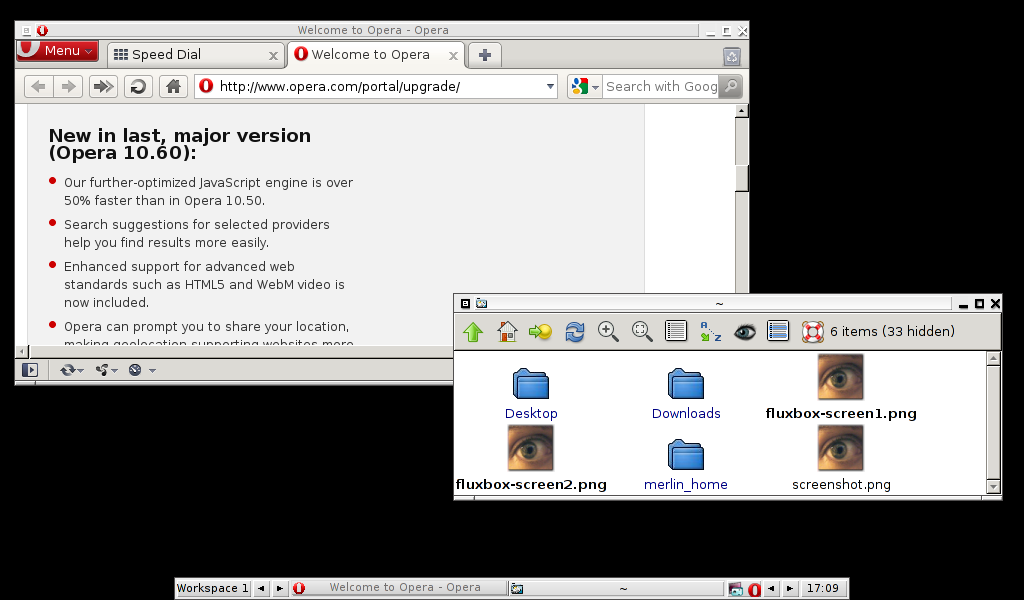
Gentoo Fluxbox Window Manager
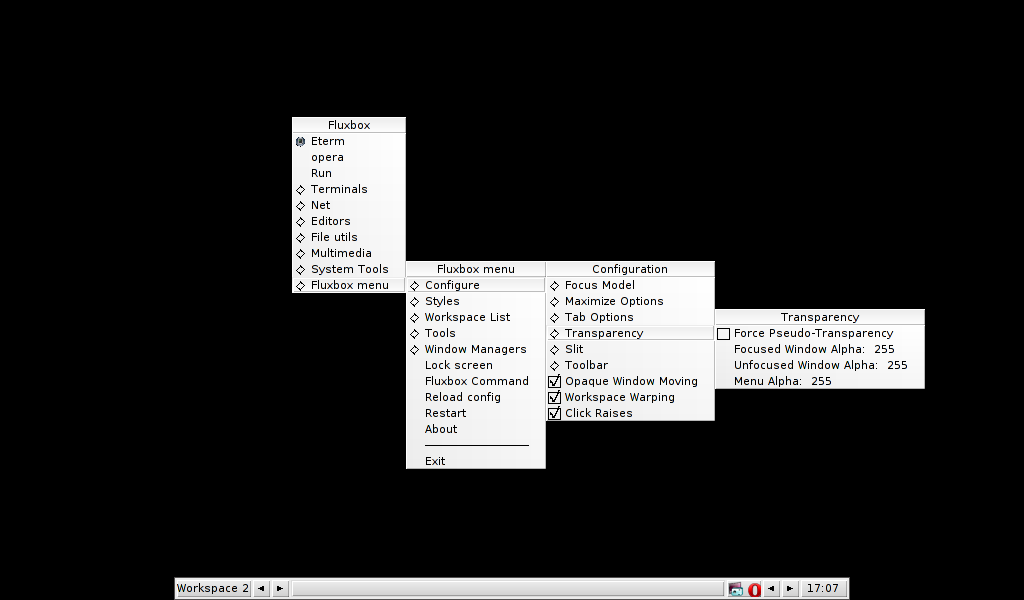
The Gentoo Fluxbox Window Manager is one of the lightest window managers available. What you are seeing is the simplicity of the application. The menus are found by right clicking on the background. But despite this seemingly minimalist window manager there is some real power behind it.
What is it?
Fluxbox is a windowmanager for X that was based on the Blackbox 0.61.1 code. It is very light on resources and easy to handle but yet full of features to make an easy, and extremely fast, desktop experience. It is built using C++ and licensed under the MIT-License.
What can it do?
Fluxbox is supplied with lots of native options such as tabbing, grouping, a long list of keycommands, Chainable Keygrabber, fully editable menu and much, much more. You might want to dive into it and learn more about fluxbox’s features.
Ubuntu Netbook Remix
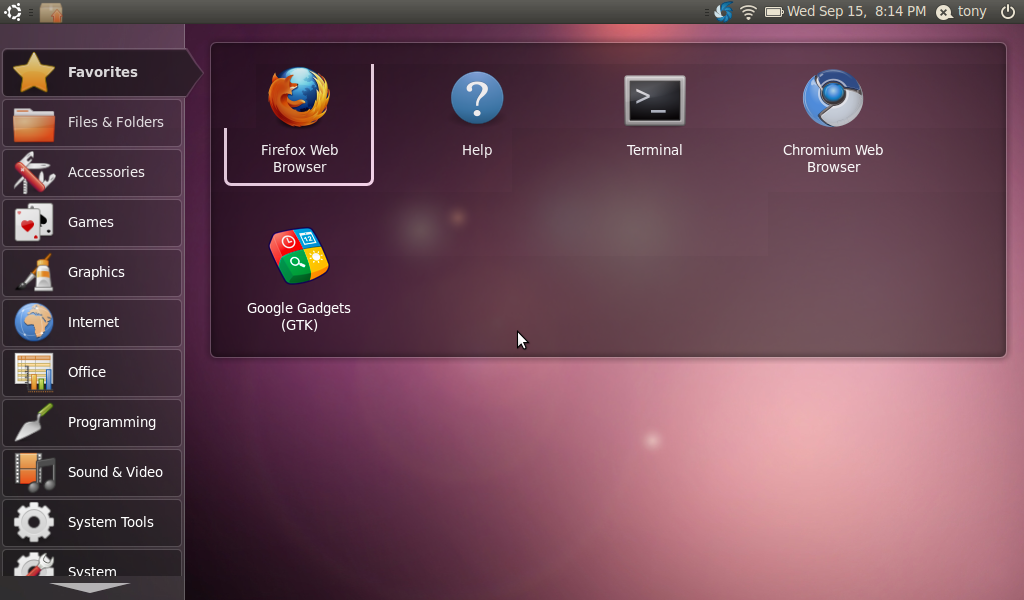
Ubuntu Netbook Remix
The Ubuntu Netbook Remix version of Linux was specifically designed for these small computers. The idea is to have a large set of menu items so they can be selected using a finger on a touch screen rather than a mouse. The primary difference is the screen, as otherwise this is a standard installation of Ubuntu.
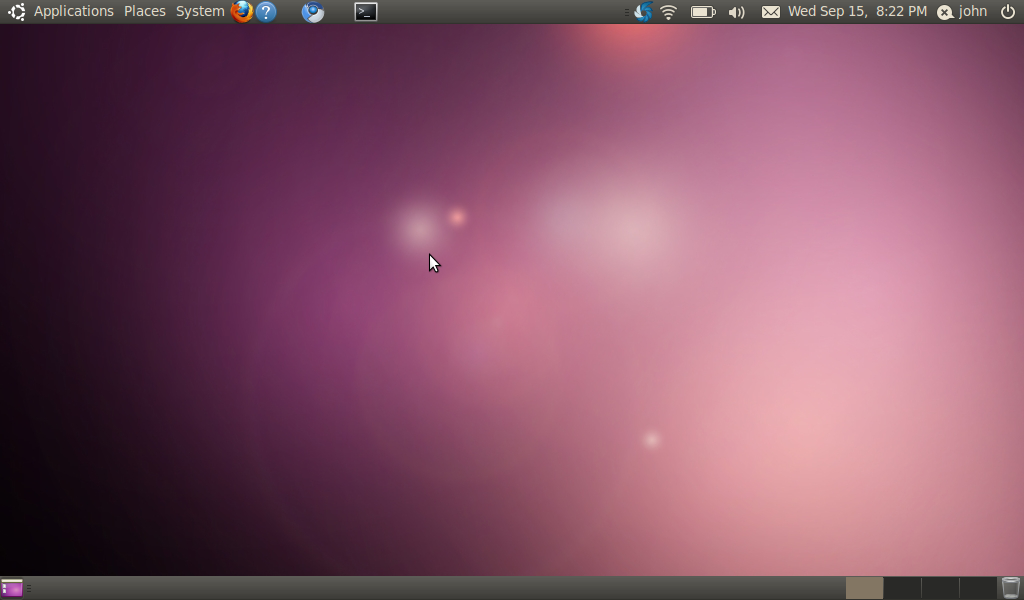
Ubuntu Standard Gnome
This is the same installation of Ubuntu, but I have select the standard Gnome desktop. I wanted to show you that you could change the desktop at login time.
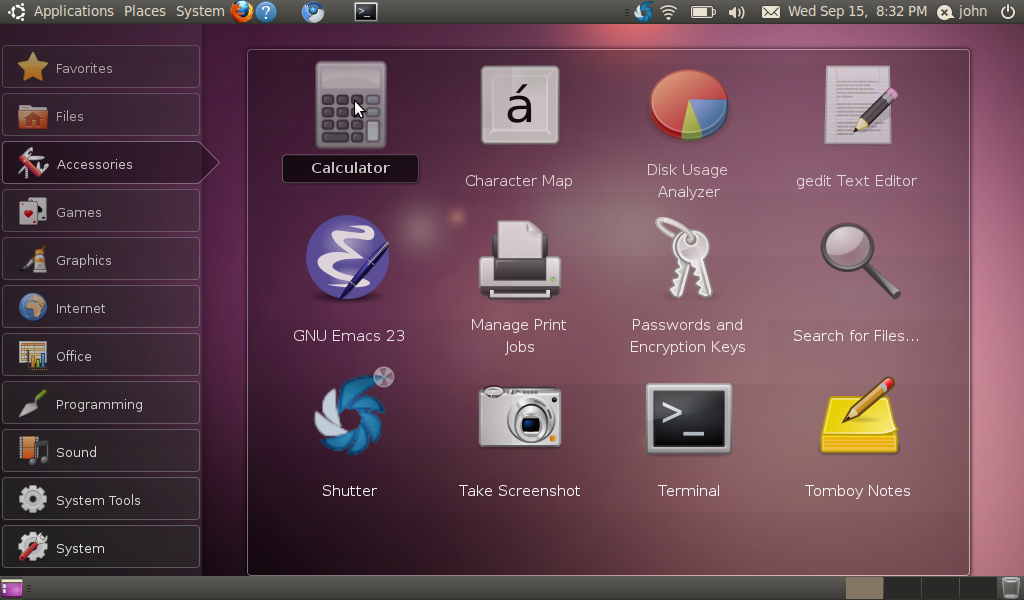
Ubuntu Netbook 2
This version of the Netbook interface is slightly different. The icons are larger and the edges of the menu bars are more square. In operation it is the same as the original version of the Netbook Ubuntu. Also be aware that the multiple screens are still present, but the selection method is different.
Linux Mint 9
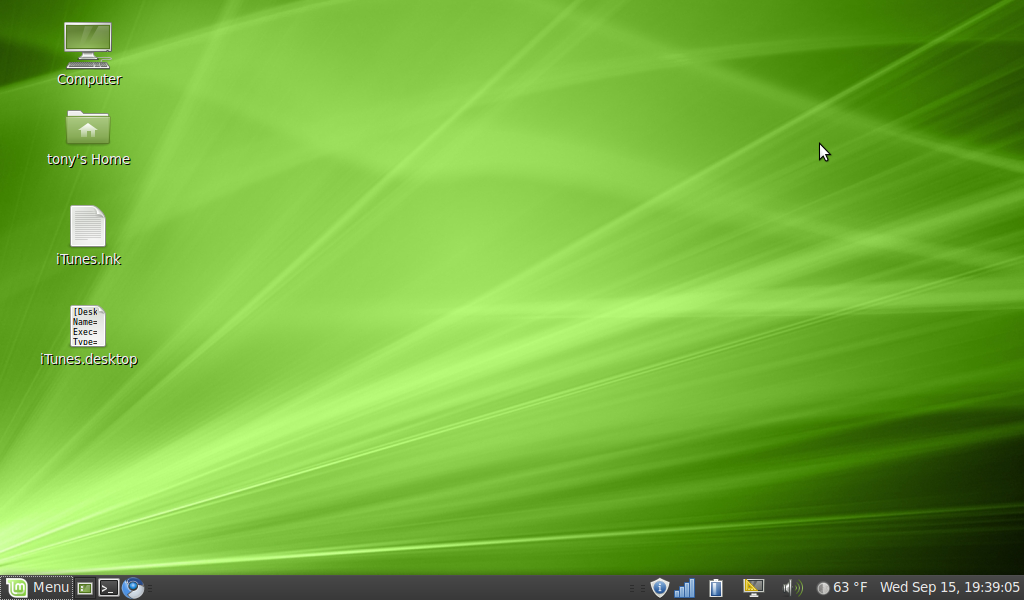
Linux Mint
This is the standard gnome desktop from Linux Mint. This distribution is based on Ubuntu and had a great deal of similiarity. In some ways it seems to be more stable with a similiar setup and commands. This is the default configuration for Mint which differs slightly from Standard Gnome in the menu.
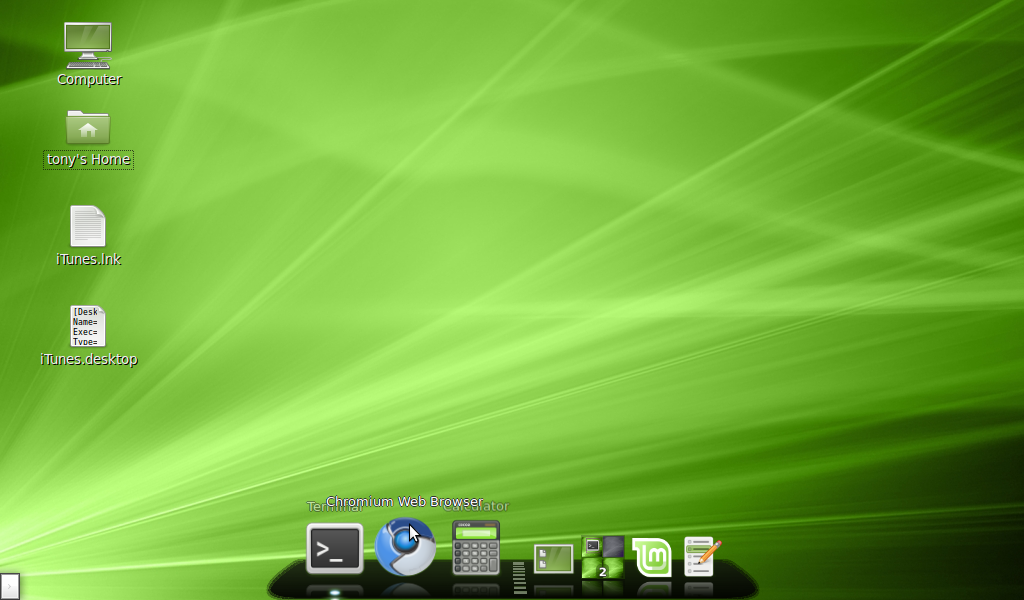
Linux Mint Dock
This version of Mint uses the Cairo-doc with OpenGL to launch the applications. This application launcher has a more limited set of applications, and large icons for fingers. Any of you familiar with Mac OSX will recognize a dock. Much of the operation of the dock came from emulating the Mac.

Linux Mint Netbook
The last image is the Netbook type interface that we saw in Ubuntu. It works the same, but you will notice that at the bottom of the screen you can still see the menu button from the stnadard Gnome menu.
Jolicloud
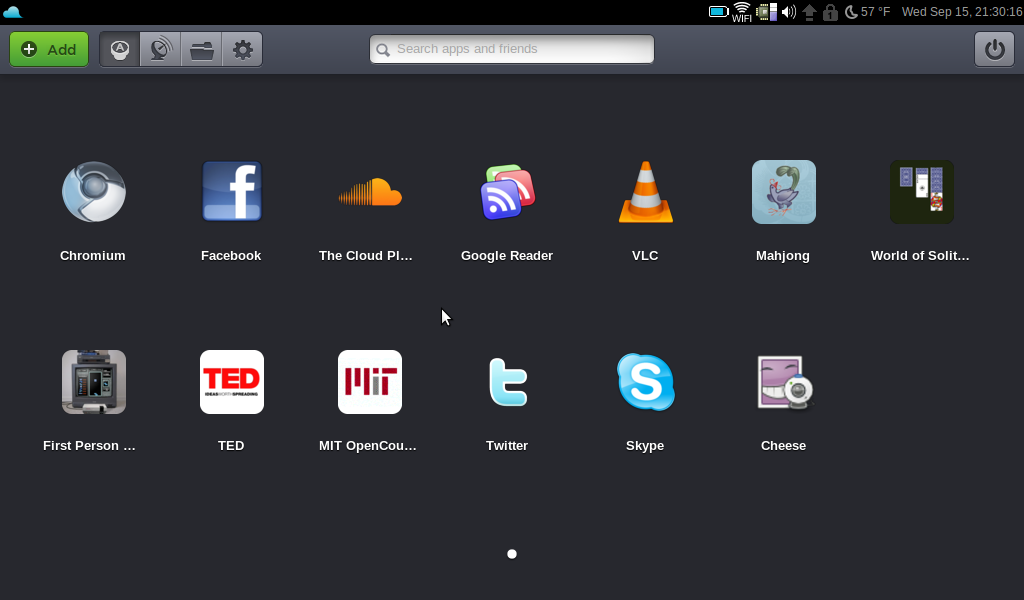
JoliCloud
Jolicloud is Linux designed for Socal interaction on the Cloud. It has taken the interface in a new direction and customized it specifically for the Netbook. This is the main screen at login. This screen is highly customizable and what you see are some of my choices for the main window.
Imagine an operating system centered around interacting with your friends. Imagine never having to worry about updates and software installs. Imagine that all your machines are automatically synchronized with one another. Imagine having your Internet ecosystem natively integrated to your machine, with all the coolest apps at your fingertips.
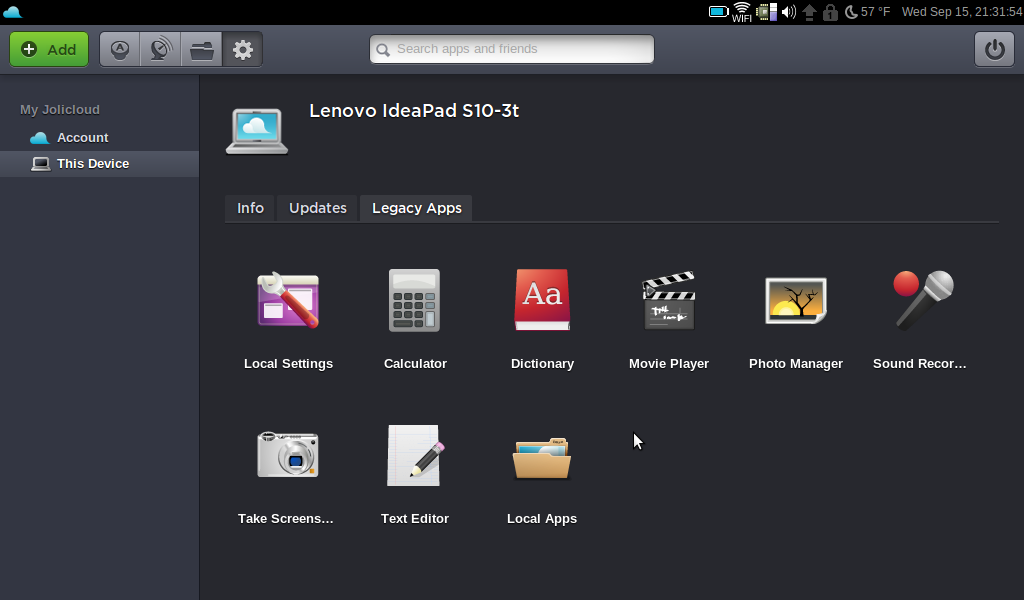
JoliCloud
This is one of the subwindows where you can see that the OS has correctly identified what computer it is running on. You will also notice the folder, Local Apps. This is a folder of the typical linux applications and menus.
Notice the Add button in the upper left corner. That is how you add icons to the screen you are looking at.
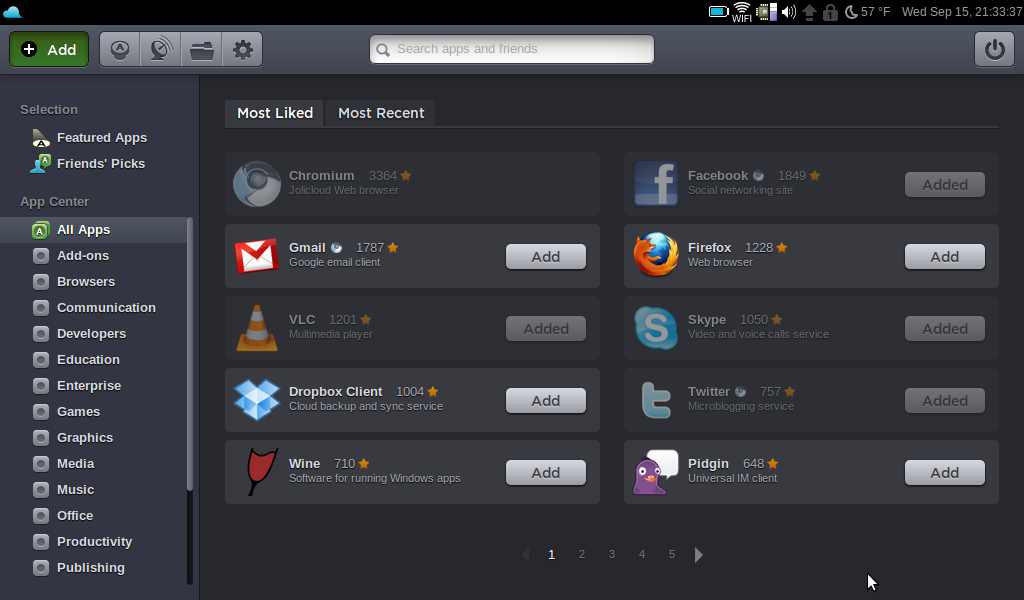
JoliCloud Software Updates
This is a view of the update manager for jolicloud. The update selector is more graphic and easier for users. This will also give you an idea of the vast number of applications available for this distribution.
Meego
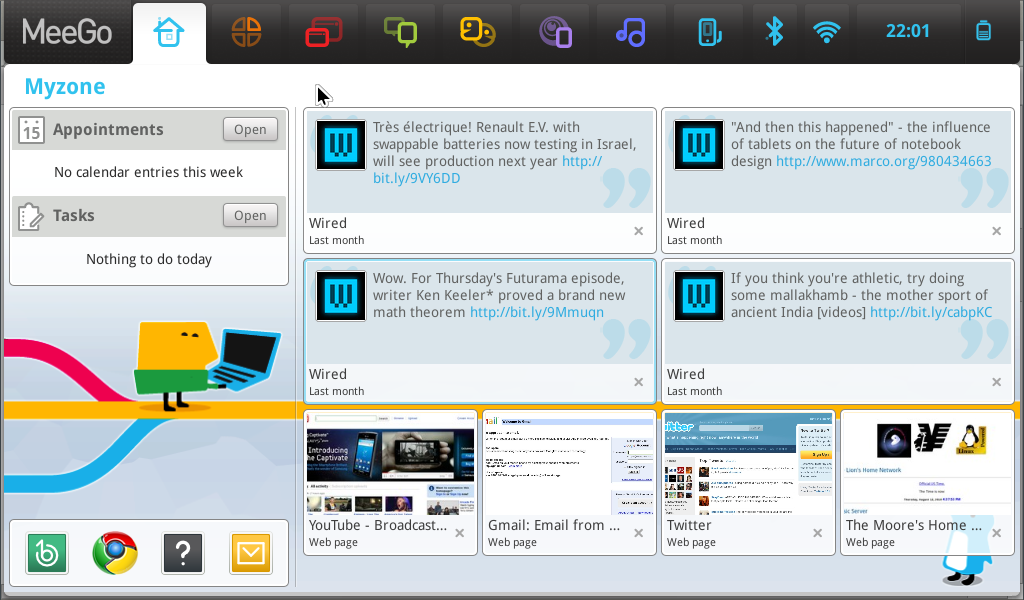
MeeGo
The MeeGo project is an interesting cross platform development project. The goal is to create an OS that can run on Netbooks, Handsets, In-Vehical, Connected TV and Media Phones. It was developed by Intel and Nokia and supported by the Linux Foundation.
MeeGo is fully open software operating system for the next generation of computing devices. Formed by Intel and Nokia and hosted at The Linux Foundation, the MeeGo platform is set to revolutionize computing and be adopted widely by device manufacturers, network operators, software vendors and developers across multiple device types. We welcome participation in the workgroup, and encourage all ecosystem participants to join the Linux Foundation and participate more closely with the MeeGo project.
Through membership in the Linux Foundation, you will support the development and protection of Linux but also gain an advantage for your company through collaboration, education and networking opportunities. Members have access to member-only benefits such as attending the Collaboration Summit (and MeeGo tracks), access to the Linux Foundation media network, including Linux.com and the ability to run for and vote for Linux Foundation board seats.
The version you are seeing here is for Netbooks and uses the Google Chrome browser. There is a developer release of this OS which will work on smart phones. The only problem is that the first phones to support it are not due until 2011.
Visually rich Netbook user experience, building on the latest open source technologies.
Instant access to your synchronized calendar, tasks, appointments, recently used files and real-time social networking updates through the home screen.
Aggregation of your social networking content. This allows you to see your social networking activities on one screen, easily interact with your friends, and update your status and site information.
For a fast and rich Internet experience the MeeGo Netbook user experience integrates Google Chrome or, if you prefer a fully open source browser solution, Google Chromium is also provided. Soon we will be releasing the MeeGo Handset user experience which will use the Fennec Mozilla Browser.
Easy to use applications for email, calendar and media player.
Highly optimized for power and performance.
Languages: Japanese, Korean, Chinese Simplified, Chinese Traditional, Swedish, Polish, Finnish, Italian, Brazilian Portuguese, French, German, Spanish, Russian, Dutch, English, British English
Written by John F. Moore
Last Revised: Tue 01 Sep 2020 08:10:12 PM EDT

This work is licensed under a Creative Commons Attribution-NonCommercial-ShareAlike 3.0 Unported License.