Table of Contents
What is Dual Boot?

So you just bought a new computer, and it came with Windows installed on the whole drive. But you have been thinking about giving Linux a try. So what can you do.
Well if you are feeling brave you could delete the Windows partition, reinstall Windows in a smaller partition formatted for Vfat. They you would be all set to move on to Linux with a clean installation. Have a look at the instructions in Reinstalling Windows with Linux
Note
This web page is being rewritten for a clean install. Please check back later.
But for this talk we will assume you want to keep your current install and only add Linux to the machine. For this we are going to use a Ubuntu 8.04 Desktop install disk.
If you need an installation disk you can download them from Ubuntu. You will then need to burn this to a CD to use in the next step.
Ready, Set, Go

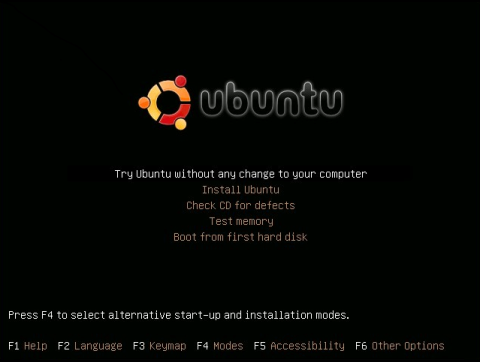
First insert the Ubuntu install disk in the driver and reboot the computer. When presented with the opening menu, you should first run the Check CD for Defects. This is a prudent test to make sure the CD is compatible with your computer, and there are no corrupted files.
Note
These instructions are following the Graphical Install for Ubuntu. You can find the instructions at GraphicalInstall, Or if you would like there is a local copy available here.
Once the check is finished, reboot the system and select Try Ubuntu without any change to your computer. This will run the system live first to make sure it works with this version of Ubuntu. This is not necessary but is a good check of your computer running the software. If this CD does not boot in live mode it would be a bad idea to try to install it on your computer.
If all goes well, you will be looking at the live version of Ubuntu now. If you are happy with what you see, double click the install icon on the desktop.
For the first three screens we will just follow the normal install options. But when we get to page 4 we will make some changes.
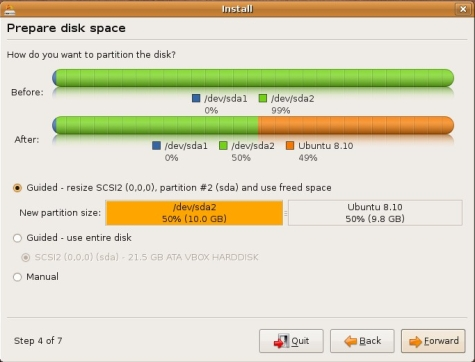
At this point we are going to follow these instructions. I will assume you have a 40 Gig disk and play on using 1/2 for Windows and 1/2 for Linux.
Select manual. Then click the Next button.
Select Partition 1. Then click the edit button.
Select size. Reduce the size to 20 Gig from 40 Gig, Then click the OK button. Ubuntu understands that you want to shrink the partition and will do so now.
Select Free space. Then click the edit button.
Set the Partition type as Primary, the partition size as 15 Gig, the type as ext3, and the mount point as / Then click the OK button. This will be the root of the Linux system.
Select Free space. Then click the edit button.
Set the Partition type as Primary, the partition size as 3.5 Gig, the type as ext3, and the mount point as /home Then click the OK button. This will be the users home partition in the Linux system.
Select Free space. Then click the edit button.
Set the Partition type as Primary, the partition size as 1.5 Gig, the type as swap. Then click the OK button. This will be the swap space in the Linux system.
Then click the Next button to proceed.
The last 3 install windows can be filled out in a normal manner. Once you are finished with the install screens the system will install normally. After rebooting the system you are done.
You might notice the next time you boot into windows it will run the check disk program. It seems to need to do this once to recover from the OS being resized, but the next boot brings the system up smoothly.
Written by John F. Moore
Last Revised: Tue 01 Sep 2020 08:10:12 PM EDT

This work is licensed under a Creative Commons Attribution-NonCommercial-ShareAlike 3.0 Unported License.